Who doesn’t love pesto? It’s basically a rite of passage to live off of a pre-made pesto pasta for at least half of your time at university nowadays, but it’s actually very simple to make yourself.
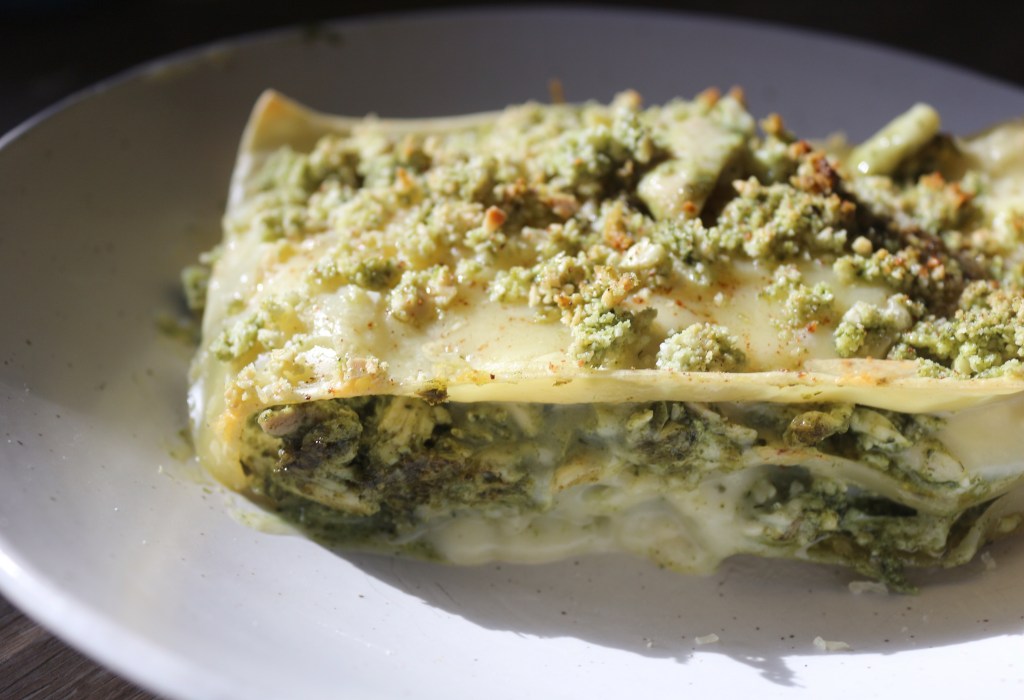
This recipe takes the greatest of the pasta sauces – both pesto and béchamel and combines them in a super creamy chicken lasagne dish, where you won’t need to spend ages simmering a ragù sauce and ensuring the meat is cooked adequately, as leftover chicken works a trick here.
With the crunch of almonds on top, combined with oozy melted cheddar, this is a super comforting dish that looks even more impressive than a standard lasagne.
Serves 2
Ingredients:
For the pesto
30g basil
30g pine nuts
2tbsp olive oil
1 clove garlic
1tbsp grated parmesan
For the lasagne
125g shredded cooked chicken
50g cheddar
4 lasagne sheets
2tbsp butter
1 clove garlic
3tbsp flour
milk
nutmeg
handful of almonds
Preheat the oven to 180 degrees (depending on your oven – use your own judgement).
Put all the pesto ingredients into a food processor and blend to a paste.
Boil some salted water and part-cook the lasagne sheets until very al dente.
To make the white sauce, melt the butter in a saucepan, add the diced garlic and flour and mix well.
Add milk bit by bit, continuing to stir on a low-med heat until you have a thickened sauce.
Grate in the nutmeg and remove from the heat.
Mix the chicken and pesto in a bowl.
In a food processor, blitz the almonds into coarse crumbs. For extra flavour, don’t wash out the processor after making the pesto, as then your almond crumbs will suck up all the excess pesto left in there.
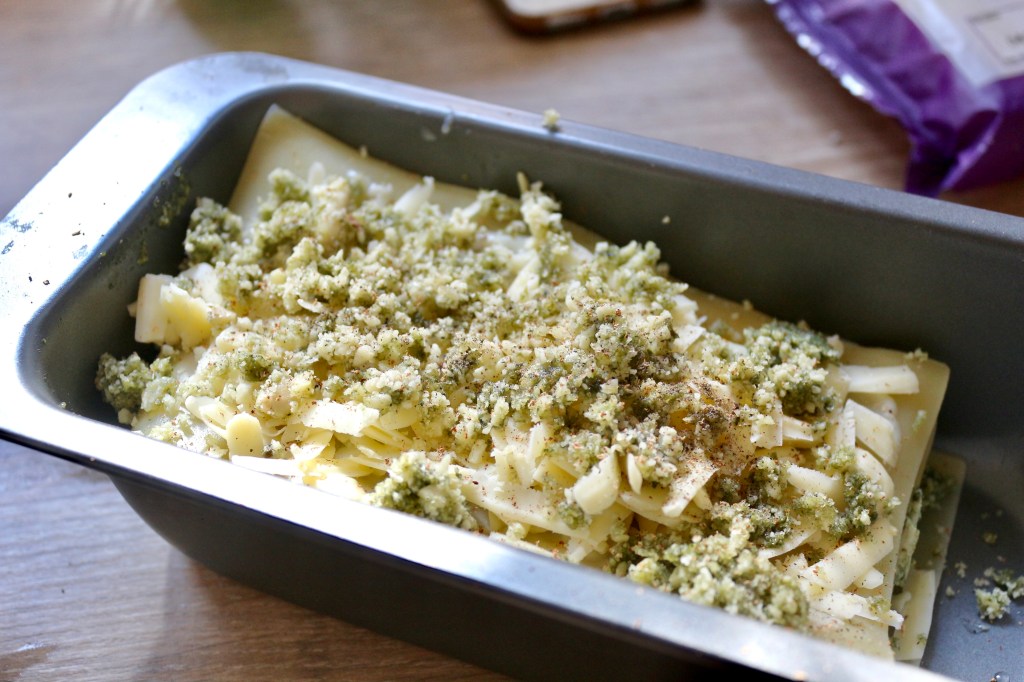
In a loaf tin, layer a lasagna sheet, then chicken and white sauce, then repeat twice more.
Top with the final sheet and sprinkle with grated cheese and the almond crumb.
Bake for 15 minutes until the cheese on top is golden.
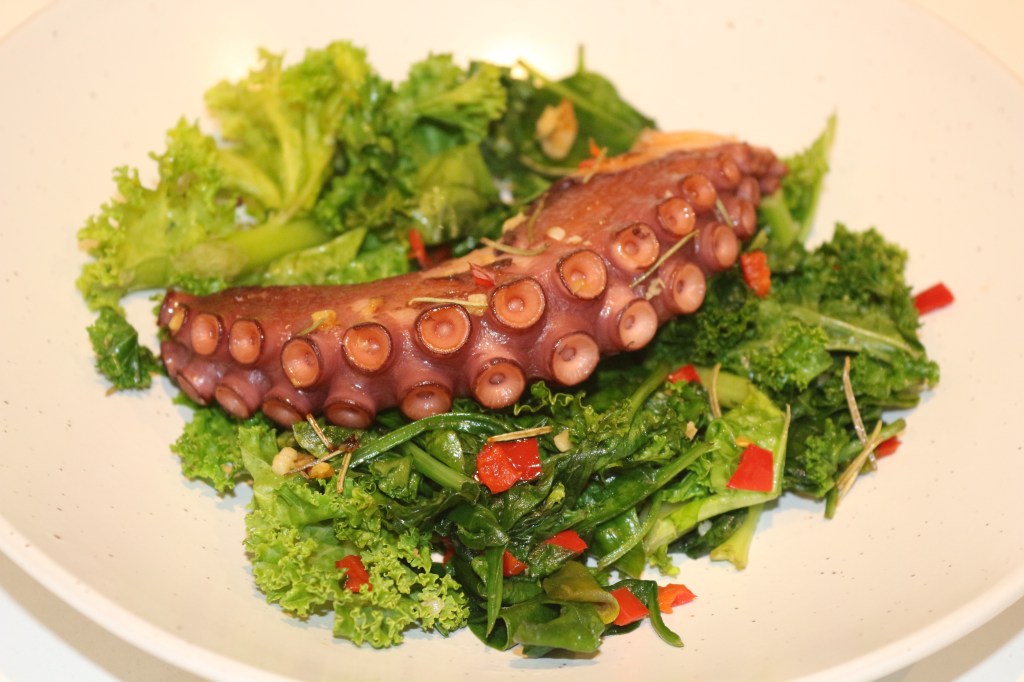
The amazing thing about cooking fish and seafood at home is, providing everything goes to plan, you end up with some serious restaurant-standard food. After a number of cheesy, creamy delights, I wanted to cook up something a bit lighter, knowing that what I was putting into my body was doing it some good, so that’s where this octopus recipe came into it.
There’s definitely a risk of over- or undercooking with octopus, both sins leaving you with a chunk of chewy, unpleasant meat, and so the key with a thick tentacle like the one I used is to cook it low and slow – a ‘bring to the boil then turn down to simmer for 45 minutes’ kind of cooking. This also allows you to get on with other things whilst cooking, and so your active time in the kitchen is minimal.
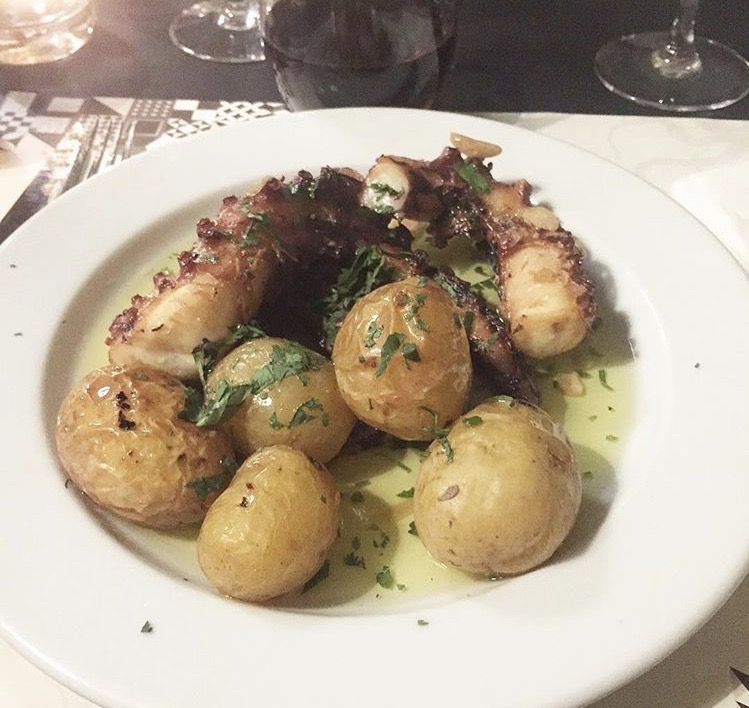
The nicest octopus I’ve ever had was at a restaurant in Lisbon. It was the first time I’d realised that octopus could be that tender, and cooked so simply. Served with some basic potatoes in a garlicky, buttery sauce (more like a light drizzle), it was pretty mind-blowing. Or at least I thought at that time that this was a revolutionary meal – changing the way I viewed octopus. Now, having cooked octopus myself that turned out equally as tender and delicious, I’m no longer under the same pretence that it’s incredibly difficult to achieve this beautiful tenderness. So simplicity here is everything. The kale with garlic and chilli will add all the flavour you need, whilst getting in some greens for a satisfying side dish.
Serves 2
Ingredients:
2 large tentacles
2 cloves garlic (crushed)
butter
splash of white wine
1 red chilli
salt/pepper
100g kale
100g spinach
Put octopus in saucepan, cover with water, bring to the boil then reduce to simmer for 50 minutes until the meat is super tender.
When done, heat butter in a frying pan and add 1 clove of crushed garlic.
When fragrant, add the octopus, white wine and seasoning and cook on medium heat until liquid has reduced and alcohol evaporated.
Put the octopus to one side, keeping it warm all the while, and add more butter to the pan, adding the sliced chilli and other clove of crushed garlic when melted.
After a few minutes, add the kale, cook for a further 3 minutes, then add the spinach and allow to wilt slightly.
Serve the octopus on top of the bed of kale and spinach
The hardest part of this recipe to be honest is getting hold of the octopus tentacles. Once you’ve managed that, you’re pretty good to go. I got mine frozen from Bradley’s online, which I’ve mentioned before in various scallop and clam recipes. They have an amazing range of frozen fish, all of which has tasted delicious when I’ve cooked with it.
This dish looks beautiful and is super healthy, so don’t let your fear of cooking with seafood put you off trying it. You’ll be surprised by how little effort is involved!
Substitutes, hacks and essentials for a delicious and nutritious diet
Before I go on, I want to make it clear that I don’t follow a plant-based diet, in fact, I don’t think there’s anything I don’t eat (except for raw celery, ew…), however, in the past year or so, I have enjoyed testing out a lot more plant-based recipes and ingredients, and am happy to whip up meat-, egg- and dairy-free meals quite regularly, alongside my steaks, chicken curries and seafood dinners.
Here I want to highlight some of my favourite plant-based alternatives and ingredients that you can try out in your own cooking, whether you want to go vegan completely, or are simply open-minded when it comes to trying new things.
A couple of disclaimers before I get stuck in – I’m aware that there are lots of people following vegan diets who have no wish to recreate meat and dairy products, and in some ways may see that as contradictory to their ethical beliefs, however, I do believe that meat substitutes are a great way of being able to replicate textures and flavours that someone following an exclusively plant-based diet may miss. Meat replacements can act as a way of enjoying food to its fullest extent without compromising on your beliefs, but if it’s not for you, then that’s no problem, just ignore those suggestions!
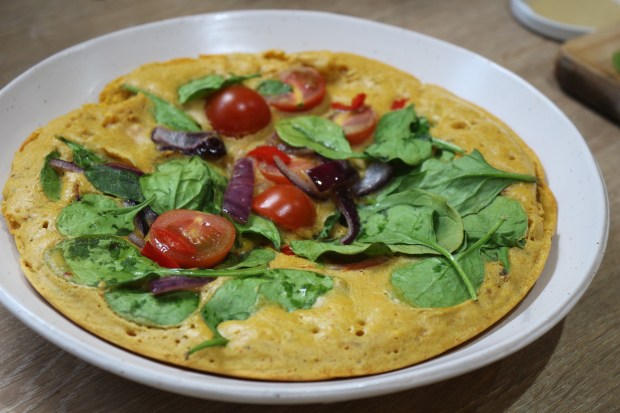
One thing that does frustrate me when I’m discovering new plant-based recipes is when they’re labelled as something they’re not. One primary example that I’ve come across is the concept of a chickpea ‘omelette’. Some people who no longer eat eggs may miss omelettes, and so on seeing a recipe with this title, you’d be forgiven for thinking that chickpeas could be warped into something resembling an omelette. Well, I’ve tried these recipes, and it’s not an omelette. It bears closest resemblance to a thick and heavy chickpea flour pancake, and so misleading titles like this do annoy me. Plant-based food can be so delicious, there’s no need to con people into thinking you’ve come up with a ground-breaking substitute. So, sorry guys, but if you only eat plant-based, as far as I’m aware, omelettes are no more.
NOT an omelette.
Anyway here come the ideas; the food and hacks that’ll make it so much easier to enjoy meat and dairy-free meals.
Dairy
Cream, milk and yoghurt
One of the biggest food groups you may be concerned about is dairy – so many of us adore cheese, many recipes call for the use of cream, and milk is a daily staple. Luckily, the plant-based alternatives are getting better and better. Alpro does a really good cream alternative, which although slightly thinner in consistency, works a dream in dishes that require a little splash, for example a pasta sauce. It’s also got a lower fat content.
If it’s curry you’re in the mood for, go straight for coconut milk. This is often used in non-plant-based curry recipes anyway and so you aren’t compromising on flavour or texture at all. Because it’s so widely used, coconut milk is cheap in comparison to other dairy-free alternatives.
My plant-based butternut squash spinach curry recipe can be found here on the blog
For your everyday milk, there are loads of options on offer. Without making a conscious effort to try everything that’s out there, I’ve ended up religiously buying soy milk. If you want to avoid soy, there’s almond, oat, and coconut milk, to name a few other options. It’s worth experimenting just to see what works best for you, as their nutritional content is slightly different, with some containing more sugars, and there are also subtle differences in flavour. Plant-based milks certainly aren’t as thick and creamy as cows’ milk, but I personally don’t miss it in my hot drinks and cereal, and you’d never know the difference when baking, even if the recipe calls for standard full-fat milk.
Yoghurt and cream cheese alternatives, in my opinion, are not quite as developed as the milk on offer yet, but there’s still plenty out there. Coconut yoghurt is one of the most common plant-based versions, however, I do find that the coconut flavour is quite strong. If you’re looking for a more neutral flavour, soy yoghurt is available, but it tends to lack the sweetness of traditional Greek yoghurt. I would opt for coconut yoghurt to eat on its own, and soy yoghurt for use in cooking and baking.
So far, when it comes to cream cheese, I haven’t seen many options readily available in my local supermarkets, but I’m sure more exist. The only one I have seen is coconut cream cheese, which I haven’t tried. I’m sure this would be ideal for baking, however, if you wanted to use it as a spread, there are other slightly different alternatives, including thick and creamy tofu spreads, or cashew cream cheese which isn’t too difficult to make at home.
Cheese
The final element of dairy to address is hard cheese, and for cheese-lovers embarking on a new plant-based journey, this can often be one of the most difficult parts, as vegan cheese has a reputation for being a pretty poor substitute. Having said that, improvements are being made, and if you’re looking for a plant-based cheese that melts, violife is the one. I absolutely love it – it’s a dream in toasties, or grated and melted as a topping on pastas, and it has a really nice flavour too. Unmelted it’s ok, but I probably wouldn’t choose to eat it that way. If you want plant-based cheese to eat uncooked, it’s worth checking out the emerging small businesses that are making their own plant-based cheeses, mostly from nuts. I bought a few cheeses from I am Nut Ok at a local market – one truffle cheese, one chipotle cheese and a jar of vegan parmesan. Admittedly they don’t taste like your typical dairy cheeses, however, they are quality products, with great flavour that can definitely contribute to filling that cheese-shaped void in your life. The Parmesan is particularly good. La Fauxmagerie is another dairy-free cheese producer that’s worth exploring.
Protein
Vegetable substitutes
When it comes to the protein in your meal, or replacements for meat products, there are so many options. Whether you’re using quinoa and beans in a chilli, aubergine slices as burger patties or butternut squash and sweet potato in soups and curries, veg, beans and pulses are incredibly versatile, and adapt to different flavours really well. One of my favourite discoveries was oyster mushrooms – they have a slightly chewy texture, and very mild flavour and are used as a meat replacement in lots of recipes, from tacos and burritos to stews. They’re not always the easiest to find but they’re definitely worth trying out.
My cream butternut squash soup recipe can also be found in the ‘Recipes’ section of the blog
Pulled Pork replacements
In the past year or two, a food trend that has emerged seemingly from nowhere is the rise of jackfruit. Despite having been a staple in many global cuisines for a long time, the western world has suddenly begun to idolise it as if it were a brand new discovery. Although it is a fruit, it’s most commonly used in savoury dishes, and one of the techniques being splashed all over the internet and in ‘street food’ menus is pulled jackfruit – a replacement for pulled pork. Its stringy texture makes it a strong substitute, and once it’s bathed in various sauces and spices, it barely resembles a fruit at all.
One of my favourite new discoveries that’s also visually (though not texturally or ‘flavourally’) similar to pulled pork, is pulled banana skin. Yes that’s right, the actual peel. I first saw it done on an Instagram story of Nadiya Hussain’s and couldn’t believe the delicious cheesy burger bun image she’d posted was filled with thick, black banana peel. Not one to shy away from a challenge, I thought I’d give it a try, and I don’t think I’ll ever be able to throw banana peel away again. You should keep it refrigerated until it goes super dark, and then use a fork to peel apart the skins, into stringy pieces. What you do next is up to you, but Nadiya throws it in a pan with some onion and garlic, and then adds a load of sweet bbq sauce.
Who knew banana peel could look so good?
Tofu
A controversial vegan staple is tofu. I completely get why people would be put off by it – to say it like it is, it’s the most bland thing you could possibly eat, and the texture isn’t particularly appealing either. So why eat it at all? Well, I guess it can be a pretty decent meat replacement, but you have to know how to cook it. It’s all about seasoning, marinating and spicing it up, maybe even with a crunchy batter or crumb. Personally I don’t think tofu is something we should decide we love or hate – actually, it wholly depends on how you eat it and what you have it with. I’ve had tofu dishes that I haven’t enjoyed, but others that have been great, including tofu katsu and tofu dumplings. One of my favourite uses of tofu was a Rachel Ama recipe where she turns it into a thick, creamy spread with the simple addition of some chives. The recipe can be found in her book ‘Rachel Ama’s Vegan Eats’ and is perfect on toast. So don’t judge it too soon – once you find a fantastic recipe, full of flavour, you’ll be able to enjoy tofu too.
Tofu and aubergine katsu – delicious!
Seitan
There are of course, some rather more ‘hardcore’ meat replacements, and by that I mean those that require a little more spending and effort in order to turn them into a tasty meal. The most on trend at the minute is Seitan. Otherwise known as wheat gluten, it’s the thick, elastic gluten leftover when all the starch granules have been removed from wheat flour dough. It’s become super popular as a much more convincing meat substitute than tofu, and has a more pleasing texture. I’ve had seitan wings, seitan burger patties and seitan doner meat to name a few, and I’ve been a fan every time. I’m pretty sure you can buy pre-prepared seitan, but some recipes (like many of Avant Garde Vegan’s) require you to make your seitan patties and bacon from scratch, which is why it requires a bit more time and dedication.
Seitan wings from Temple of Seitan in Hackney/Camden
There is some debate over these kinds of meat replacements in terms of what nutrition they actually provide for our bodies. With meat you’re getting a solid helping of protein, and from vegetable-based meat replacements you take in multiple nutrients, however the likes of tofu and seitan don’t really have much to offer. For me, these types of substitutes are more of an occasional purchase, and ideally it’s much better to cook with food that bears greater resemblance to its original form, i.e. fruit and veg.
Eggs
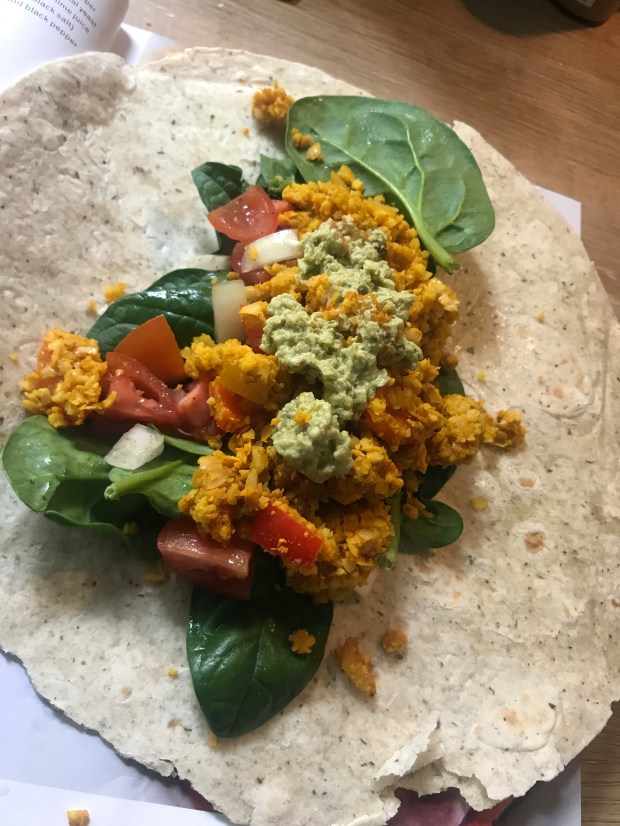
Moving onto eggs, these are something that you may be struggling to work out how you’re going to live without if you’re considering going vegan. There are various replacement options, depending on the type of egg you’re after. To be honest, I don’t have anything to offer when it comes to fried or poached eggs, however, scrambled are a popular vegan choice. Common replacements include, tofu, mashed chickpeas and ackee (a fruit popular in the Caribbean). I have tried the ackee concept, but am yet to have cooked it successfully so can’t speak on behalf of that one. Tofu scramble can be very nice, providing it’s well-spiced and seasoned. One of my favourites, though, was another of Rachel Ama’s recipes for a chickpea scramble breakfast wrap. I’m not sure the scramble would be as satisfying on it’s own, but certainly as a filling it tasted fantastic, and the texture wasn’t bad.
When it comes to baking with eggs, there are a number of options. To recreate the binding effect that eggs offer, mixing chia or flax seeds with water is a great option, as the seeds expand as they take on water, and you’re left with a thick, gelatinous mixture. Things like apple sauce are a great way of getting moisture into bakes without using eggs, although from the vegan baking recipes I’ve tried so far, as delicious as they’ve been, they never quite achieve the same rise.
Sauces and flavourings
There’s absolutely no reason why plant-based food should be bland, as generally sauces, stocks and spices are in no way off-limits to those avoiding animal products, even if specific vegan versions have to be made. One of the most commonly used flavourings in plant-based meals is nutritional yeast. These flakes can be added to sauces, pastas and even water to create a kind of stock, and they have a distinctly cheesy smell and flavour that otherwise would be missed in a vegan diet. Miso paste, liquid smoke and soy sauce/coconut aminos are other key flavour boosters – you can even buy vegan fish sauce.
It’s also super easy to create plant-based sauces from scratch. Avoiding dairy products, cashews are a key ingredient for whipping up thick, creamy sauces – they just need to be soaked for a few hours then blended along with whichever other flavourings and ingredients you’re craving.
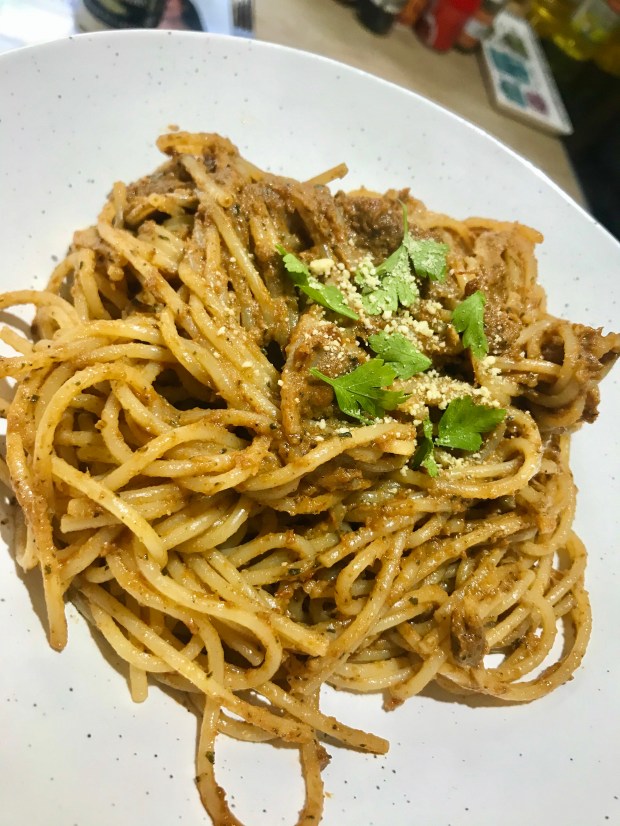
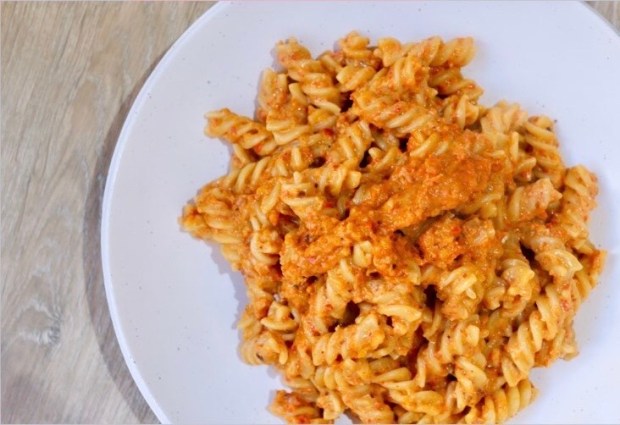
Although standard pesto isn’t vegan (or vegetarian for that matter) due to the use of parmesan, it’s incredibly easy to either leave it out, use a vegan version, or just add a sprinkling of the aforementioned nutritional yeast. Rather than sticking with the same pasta sauce every day of your life, pesto is such a fun one to jazz up, as it can be made with any combination of veg, nuts, garlic and olive oil.
Sun dried tomato pesto pasta from Rachel Ama’s Vegan Eats
Obviously tomato-based sauces never have to be off-limits, but even these can be made more exciting by incorporating sun dried tomatoes or red peppers into the mix. You can try pesto versions of those ingredients, or mix them with soaked blended cashews for a creamy red sauce – much like the equivalent of a little tomato puree swirled through some mascarpone, only with loads more flavour.
creamy red pepper pasta – sauce made with cashews
Baking
Baking is one area in which it can be a bit tougher to convince people of plant-based ingredients’ ability to get the job done. But believe me, I’ve followed a few plant-based sponge recipes now, and they have been delicious. As I mentioned regarding the lack of eggs, you don’t quite get the same rise, but they do still rise enough. Apple cider vinegar is a good addition as it should react with your raising agent (baking powder or bicarb) to generate a slightly more significant rise. For added moisture in your bakes, bananas or apple sauce are decent options, although obviously they will affect the flavour to an extent.
lemon drizzle and pistachio loaf cake
Believe it or not, meringues aren’t off the cards either. Odd as it may sound, aquafaba, which is the liquid you find in tinned chickpeas etc, is the main ingredient in whipping up vegan meringues, although not having tried it myself, I’m sure it takes a fair bit of practice.
chocolate ganache torte using coconut milk and vegan chocolate for the filling
In terms of brunch baking, fear not, because pancakes and French toast are still firmly on the menu. For your French toast egg wash replacement, simply combine plant-based milk with maple syrup and vanilla essence and soak your bread in that. Pancakes can be made equally as easily without eggs – a base mixture of milk, flour, baking powder and vanilla essence will do just fine.
What this post goes to highlight is just how many creative, straightforward and widely shared options there are nowadays when it comes to cutting down on your meat/fish/dairy/egg intake or avoiding animal products altogether. This also applies to the kinds of ingredients you can access in supermarkets, with vegan versions of chicken, mince and bacon now all being pretty common finds. Lots of popular confectionary such as Oreos, Biscoff and party rings are also vegan certified so you don’t have to miss out on the good stuff.
Even vegan doughnuts are on the rise – check out this PB and Jlo doughnut from Doughnut Time…
So whether you love doing your bit for animal welfare and the environment, or you still love a juicy beefburger, there shouldn’t be anything to stop you from being a bit more experimental in the kitchen when it comes to eating well. Buddha bowls, seitan steaks and chickpeas galore, plant-based definitely isn’t something to be feared.
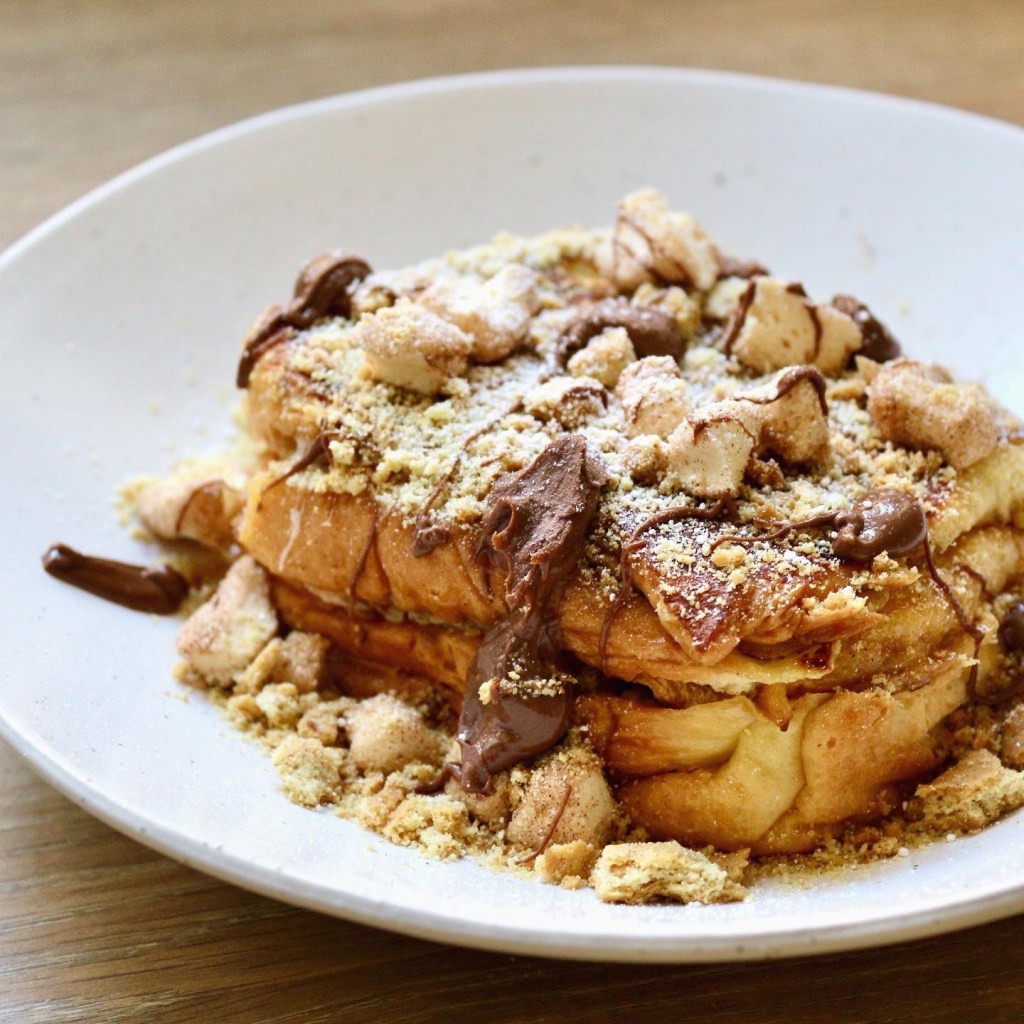
Cooking for one can require a lot of planning sometimes, but luckily for me, I am the food planning queen. My intensive organisation essentially means I avoid wasting food, whilst also avoiding cooking the same boring meals over and over. If I plan, I can decide how to use the same ingredients to create different dishes, and that’s where my French Toast comes in.
One whole loaf of Brioche is quite a lot for one person to get through before it gets past its best, but I certainly managed it. Here are two ways to use that loaf in a short space of time in completely different meals. Both ideal for a delicious brunch, my sweet French toast stack, and savoury gooey eggy bread are indulgent, comforting and restaurant-brunch-worthy.
They’re incredibly easy to follow, so be sure to give them a go!
SWEET
Rocky Road Brioche French Toast Sandwich Stack
Serves 2
Ingredients:
6 slices of Brioche
Nutella
6 digestive biscuits
2 handfuls marshmallows (mini or larger ones torn into smaller pieces)
2 eggs, beaten
2 tbsp honey
2tsp vanilla essence
icing sugar
butter
Whisk together 1 egg, 1 tbsp honey and 1tsp vanilla essence.Soak both sides of 2 Brioche slices – you don’t need to leave them for very long at all, as the egg mixture will very quickly saturate the Brioche and you don’t want it to end up falling apart!
Heat the butter in a non-stick pan and fry the 2 soaked slices until golden on both sides. These will form the middle slices of each stack.
Soak just one side of 4 more slices – 2 slices will form the tops of the sandwiches and 2 will form the bottom layers. At this point I needed to make a 2nd bowl of egg wash mix, hence the need for 2 eggs above so you may need to do the same.
Now stack your sandwiches. The bottom slice should have egg wash only on the bottom side, and be dry on top. To this slice, add a layer of Nutella, a generous sprinkling of Marshmallows and crumble some chunky-ish pieces of biscuit over the top.
Now add the middle slice of Brioche – remember, this is the one that we cooked at the beginning with both sides sealed in egg wash. Repeat the layering of Nutella, marshmallows and crumbled biscuit, and finish with the top slice (egg wash side facing upwards).
Heat some more butter and add your 3 layer sandwich stack. Weigh it down by placing a small plate on top, followed by a heavy tin, as this will encourage everything in the sandwich to melt and bind it all together.
After a couple of minutes on a low-medium heat, check that the bottom is golden brown, then turn over and do the same with the other side.
Remove the sandwich to a plate (can cover with foil to keep warm), and repeat with your second sandwich.
When both sandwich stacks are complete, sprinkle over the remaining marshmallows and biscuit crumb and drizzle over as much heated, loosened Nutella as you wish.
Finish with a sieved sprinkling of icing sugar and dig in!
As always, I love a good plantification of dishes. For those unsure, that translates as a vegan alternative. As farfetched as it may seem, this is definitely not out of bounds for those following a plant-based diet. Nowadays you can buy vegan Brioche, get vegan Nutella equivalents, vegan butter-based biscuits and vegan marshmallows. The egg isn’t even an essential! For your wash, simply mix some plant-based milk with a little vanilla essence and maple syrup and it still work really well!
SAVOURY
Caprese Eggy Bread
Serves 2
Ingredients:
4 slices of Brioche
1 ball of mozzarella
handful of basil
6-8 cherry tomatoes (depending on how much you like them!)
salt/pepper
1-2 eggs, beaten
pesto – homemade or from a jar
butter
Preheat the oven to 180C, and when ready, roast the tomatoes in a little oil, salt and pepper until they’re just bursting from their skins.
Spread a layer of pesto on top of 2 of the Brioche slices.
Tear the mozzarella and place that on top.
Sprinkle over some pepper, followed by some basil leaves and the tomatoes. Add a little more salt and pepper and then top with the other slice.
Soak the top and bottom sides of each sandwich in the beaten egg and then cook in melted butter in a non-stick pan on medium heat until golden brown. Like with the sweet version, place a small plate over the sandwich, topped with a heavy tin to weigh it down and encourage the mozzarella to melt and the sandwich to bind.
Repeat on the other side and then slice into 2 large triangles to serve.
You may notice in the image above that I used larger salad tomatoes instead of roasted cherry tomatoes. Well, those tomatoes were rubbish and I don’t recommend trying that version – annoyingly, it’s the only photo I have!
Feel free to alter the proportions when it comes to the quantities of mozzarella, tomatoes, basil and basil you use. Make it your own, just how you like it. My original version of this recipe didn’t feature pesto, so you could try it without and the gooey mozzarella with sweet roasted tomatoes should do the trick equally as well – you could always add a drizzle of balsamic too, but I just adore pesto, and combined it creates a delicious pool of Italian flavours.
This has been one of my most exciting recipe posts to write, because having tasty, creative French toast dishes at home feels like such a luxury that’s normally reserved for quirky cafes and restaurants. But now it’s super simple for you to try yourself. Awful day at work? Why not go wild and even try it for dinner one day? When it comes to my meals, there are no rules.
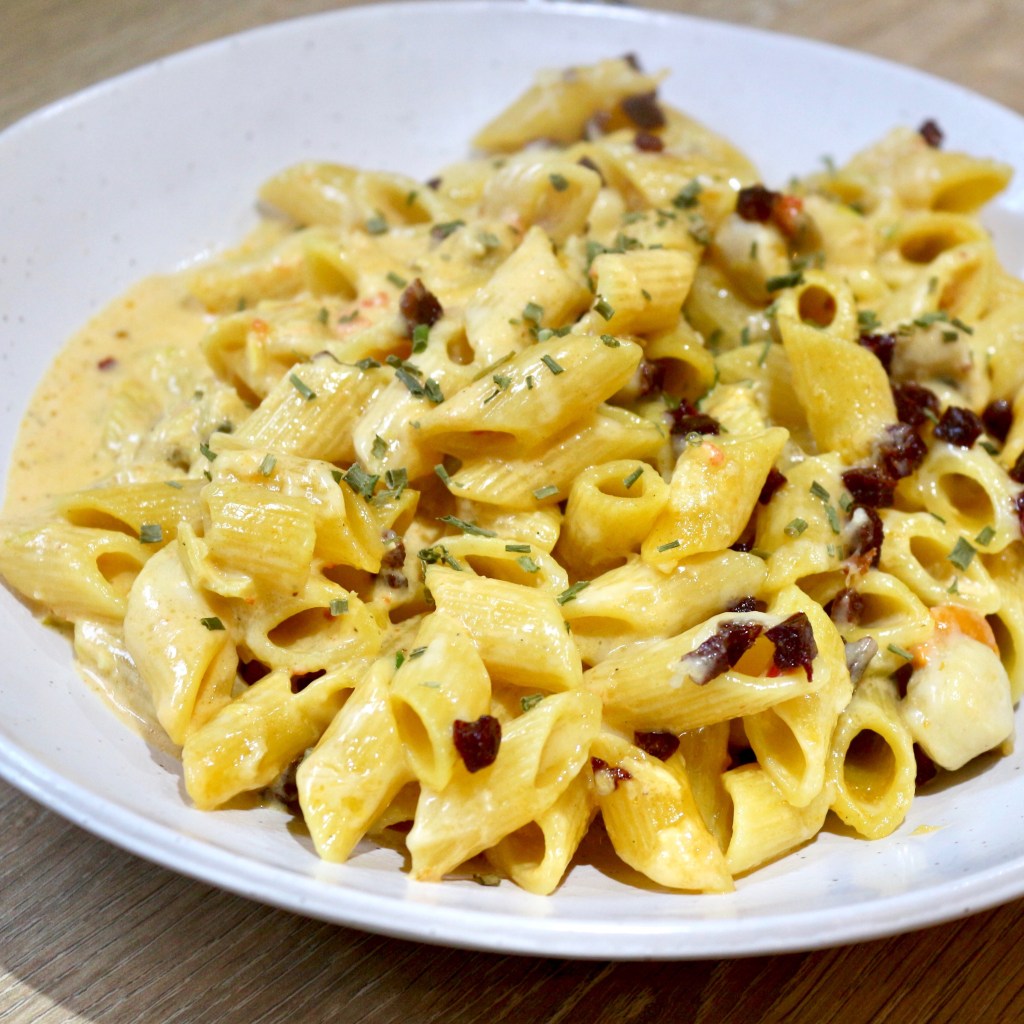
This pasta recipe combines the fanciness of scallops, with the flavour of chorizo and the comfort of gooey melted cheese. Basically, it’s the best of all worlds.
Recently I did a big order of frozen fish and seafood from Bradley’s, a family-run business based in West London. They only sell frozen fish, with the concept behind that being that often, lots of the ‘fresh’ fish we eat isn’t actually fresh at all, and has spent a fair while being transported around before it ends up on our plates. Their fish however, is frozen within 3 hours of being caught, therefore ensuring that both the flavour and the nutrients are bound within the products from the outset, so they taste just as good whenever you choose to eat them later down the line.
Part of my order included the queen scallops featured in this recipe. The kilo bag has provided me with many meals so far, with plenty more to come, and texturally and flavour-wise these small scallops are pretty good quality.
Serves 2
Ingredients:
200g penne pasta
30g chorizo
½ leek
1 red chilli
2 cloves of garlic
150ml double cream
150ml fish stock
2 tsp sun dried tomato paste
small pinch saffron
1tsp chilli flakes
salt/pepper
200g scallops
chives
parlsey
50g cheddar (grated)
Chop the chorizo into tiny crumb/cube pieces then fry until beginning to crisp and set to one side.
Fry the chopped leeks with the chilli and garlic on a low-medium heat until soft and fragrant.
Cook the pasta according to packet instructions.
Add the cream, fish, sun dried tomato paste, saffron, chilli flakes, salt and pepper to the leek mix and continue to cook on medium heat for 15 mins until reduced slightly.
For a super smooth pasta sauce you can blend the creamy leek/stock mix at this point using a hand blender, although it isn’t essential.
Add the scallops, chives and parsley to the pan with the sauce then mix in the pasta.
Place in an ovenproof dish, and top with grated cheddar and the chorizo crumb. Put the dish under the grill until the cheese is golden and melted.
Sprinkle with more chives to serve.
I always like to include alternative adaptations of my recipes, and this one is no different. If you can’t get hold of, or don’t want to use scallops, other seafood would also work. Admittedly, if you’re desperate to showcase amazing scallops, you probably won’t be serving them in a pasta dish, so for me, the scallops aren’t actually the most important part here. Pasta + salty chorizo + cream/cheese + seafood is always going to be a success, whatever ocean-dwelling treat you choose to include!
If you told me a couple of years ago that I’d regularly be eating soup for lunch and dinner I would’ve scoffed. Soup is a liquid meal – how can that possibly satisfy you and fill you up? Well, somehow it does, and I’ve now tried so many delicious soup recipes (Ainlsey Harriott’s in his Caribbean Kitchen cook book are fab), that I thought it was about time I came up with some of my own.
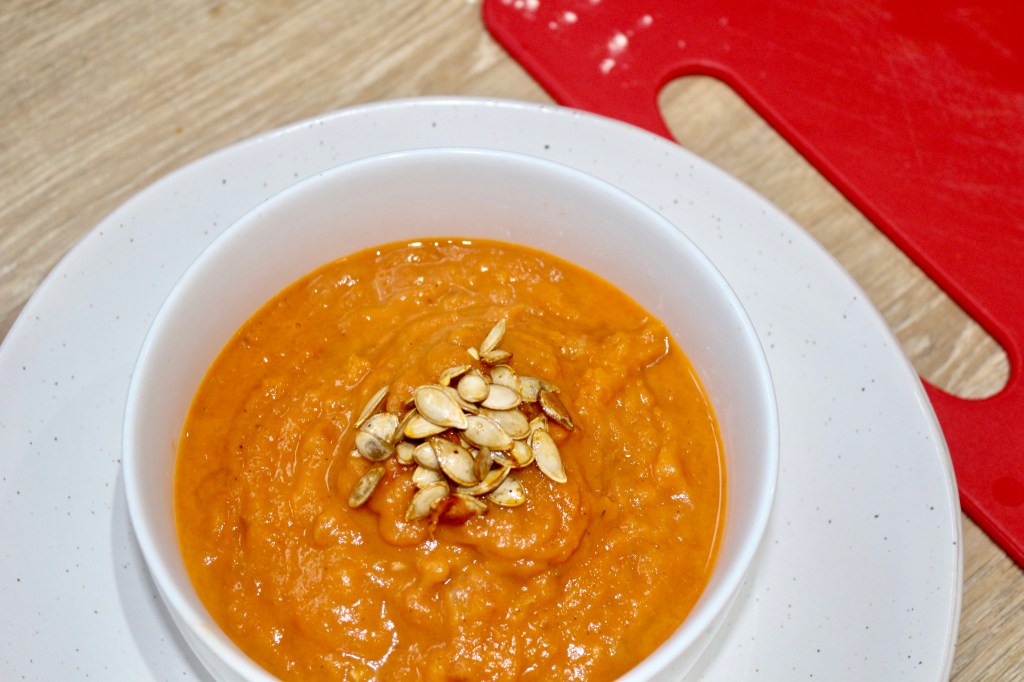
Butternut squash soups have always been some of my favourite, and a lot of that is down to the fact that they are never watery. I love a creamy soup, and with squash, you can get that lovely consistency without even having to add cream, and so it can still be a super healthy meal.
My soup recipe below is not only healthy, but also entirely plant-based (pretty easy to achieve with soups), and I’ve kept a pretty thick consistency. If you wanted a smoother, runnier soup, all you’d have to do is add a little more water, and blend more thoroughly.
And as anti-food waste as I am, there’s no need at all to throw away the seeds. They’re delicious roasted, and add a lovely crunchy to finish off the soup.
Serves 2
Ingredients:
½ squash (plus seeds)
1 carrot
2 ½ tbsp honey
1tsp paprika
salt/pepper
olive oil
1 onion
½ chilli
1 clove garlic
1 stick celery
50ml coconut cream
1 tin chopped tomatoes
100ml water
1tsp nutmeg
1tsp cayenne pepper
1tbsp nutritional yeast
Roast the squash and carrot (both diced) with 1tbsp honey, paprika, olive oil and seasoning until soft and caramelised.
Roast seeds in separate tray with the same honey coating (use ½ tbsp) until golden. These won’t take as long as the veg, so keep an eye on them.
Sweat the onion in a saucepan or deep casserole dish (anything that the soup can happily sit in without overflowing!), then add the garlic and chilli.
Add the chopped celery and seasoning.
When the veg has finished roasting, add to the pot along with the coconut cream, tomatoes and water.
Add the remaining spices, honey and nutritional yeast, and after stirring, bring to the boil then reduce to simmer for 20 mins.
Remove from heat and blend with a stick blender and add a splash of water if the soup is too thick.
Return to simmer for 5 mins then serve topped with the seeds.
This soup is full of flavour, with a little spicy kick to it, and there’s no way you won’t be satisfied after finishing a bowl. You could serve with crusty bread, but as this soup is on the thicker side, I find that I don’t necessarily want any heavy carbs to dip in (with a thinner soup it’s a different story…).
As is the case with most of my recipes, they’re really easy to adapt if you don’t have all the ingredients. Nutritional yeast isn’t essential, it just adds an extra, subtle umami flavour, and I prefer using a small amount of these flakes to a load of vegetable stock. Sweet potatoes would also work really well for the base of the soup, roasted cherry tomatoes instead of tinned tomatoes, and the coconut cream could be replaced by any other cream or coconut milk, or even just left out entirely for more of a light veggie, tomato flavour.
I really do love this recipe, more so than any of the other squash soup recipes I’ve tried elsewhere, so do give it a try.
Many moons ago, after making my delicious paella, I used the mussel and prawn shells to make a shellfish stock which had been sitting in my freezer for a while waiting to be used. I didn’t want to use it for another rice dish, so came up with an alternative using noodles, which I very rarely cook with.
This broth is super light, but it certainly isn’t watery; I also refuse to call it a soup, as there’s so much more going on. It’s a bit of a spicy one, but of course you can play around with the ingredients to make it milder if you prefer; I however, love the kick.
I topped my noodle broth with some dumplings that I can’t claim as my own – I actually followed a recipe from Rick Stein’s Road to Mexico, but I definitely recommend seafoody-style dumplings as an ideal topping, as they add different textures to the dish, along with even more flavour. If you don’t want to go to the effort of making dumplings, other seafood such as prawns would also work really well, and as for the veg, you can mix and match as you like. I love steamed pak choi, but if I’d had some bean sprouts I definitely would’ve added those to.
This is a pretty straightforward recipe, but in order for it to really work, a stick blender is highly recommended, as otherwise you end up with little chunks of onion and chilli floating around, and although that doesn’t affect the flavour, you don’t get a lovely smooth texture. Stick blenders are so worth buying though, especially if you’re a fan of making soups and broths at home.
Serves 2
Ingredients:
1 onion
2 cloves of garlic
chunk of ginger
1 red chilli
small handful of cherry tomatoes
2tsp fish sauce
1tbsp rice wine vinegar
shellfish stock (or fish stock if you don’t have shellfish)
1 400ml tin coconut milk
2tsp sweet paprika
2tbsp sriracha
2tsp miso paste (dark)
bunch of coriander
2 nests of noodles (I used wholewheat)
1 spring onion
paprika flakes
chilli oil
optional toppings, i.e. dumplings, pak choi, bean sprouts, prawns, baby corn
Heat the onion to sweat, and then add the garlic.
Add the chopped or grated ginger, chilli and tomatoes and cook for 5 mins on a medium heat, stirring occasionally (turn down heat if they start to burn or catch on the bottom).
Add the fish sauce and rice wine vinegar and cook for a further 5 mins.
Pour in the shellfish stock, coconut milk, sriracha, miso paste and paprika, sprinkle in some chopped coriander and leave on a low-medium heat for 15-20 mins for all the flavours to soak each other up.
Meanwhile cook your noodles and any toppings, i.e. steam the pak choi. NB. You could cook the noodles in the broth later on after it’s been blended if you prefer.
Use a stick blender to blend the broth to a smooth, slightly creamy consistency.
Add the noodles and top with whichever seafood or vegetables you’ve chosen
Finish with a sprinkling of paprika flakes and spring onions, and a drizzle of chilli oil.
I love the colours in the finished dish – the bright, glossy orange, with the deep red paprika flakes and the contrasting fresh green from the veg. Although not based on any specific dish, this recipe is strongly Asian-influenced – I realise what a broad, sweeping statement that is – but I love how broth-style meals are such a staple in places like Vietnam (Pho), Malaysia (Laksa) and Japan (Ramen). They’re all so different both in terms of flavour and consistency, but what they have in common is the ability to demonstrate just how punchy, comforting and delicious, all at the same time, soup-like meals can be.
I love puff pastry. The pre-prepared kind, that is. I’ve never attempted to make it myself, and maybe one day I’ll give it a go, but for now, ready-rolled is an absolute lifesaver.
I love the crunch as you bite into it, with little flakes floating down everywhere. It has a lightness that shortcrust lacks, and a delicious butteriness that you don’t get from filo.
Because you don’t need to make the pastry, this tart is so simple to make, and can be served as one large tart, or smaller, individual versions, using exactly the same measurements.
I used the amazing Beauvale blue cheese from Cropwell Bishop Creamery, which is local to me, as it’s incredibly creamy which is ideal for creating the dreamy melted blue cheese topping, rather than an equally as delicious, but not so practical crumbly Stilton.
From the photos, you’ll notice that there are two versions of this tart that I made. The first used all the ingredients, but I wasn’t happy with the base, so decided to remake it, and the second version was spot on. Having said that, I didn’t have enough puff pastry or any pears the second time, hence the smaller tarts and fewer toppings.
You can absolutely get the tart to cook through completely without the bottom being soggy, but don’t be afraid to let the outside edges brown a little more to do so. Baking the pastry blind beforehand will also help to ensure it’s completely cooked through.
I won’t even lie, the first time I made this, I ate the entire tart in one go. I just kept going back for more it was so good, so now, over to you…
Makes 1 large rectangular tart and 4 individual tarts
Ingredients:
½ packet of ready rolled puff pastry
½ butternut squash
salt/pepper
rosemary
1tbsp cornflour
1btsp honey + 1btsp balsamic vinegar (combined)
1 pear
75-100g blue cheese (the creamier the better)
1 egg, beaten
chopped walnuts (optional)
Preheat oven to 180.
Cut squash into thin discs and add to a baking tray with olive oil, salt, pepper and rosemary, and roast until soft. This shouldn’t take long – around 10 mins, depending on your oven.
Unroll the pastry and fold over the edges to create a crust. Bake the puff pastry until puffed up and starting to brown slightly (5-8 mins).
Remove pastry from the oven and flatten out the puffed up centre.
Sprinkle the cornflour over the pastry base so that any excess moisture from the filling will be soaked up.
Layer over the squash, pear and chunks of blue cheese, then brush the edges with egg wash before placing back in the oven to bake until golden and cooked throughout. You will need to monitor the base as this will cook slower than the edges which will brown quickly, so turn the heat down if need be.
After removing from the oven, ensure base is not soggy, top with the chopped walnuts and drizzle with the honey/balsamic vinegar dressing.
I topped the finished tart with my favourite spice mix, which is a Spanish brand, including garlic, onion, thyme, chilli flakes and some other spices in there, but you can top with whatever you enjoy – whether that’s a sprinkle of chilli flakes, a few sprigs of rosemary, a dusting of pepper, or just leave it as is!
Once you’ve baked your first tart, you’ll realise how easy it is to customise and make it your own. There are so many different toppings you could experiment with, from Italian caprese, to goat’s cheese and honey, or a classic cranberry and Brie. So get experimenting, and…