Arancini are one of Italy’s most delicious deep-fried snacks. Varying in size, they’re basically deep fried risotto, often with a particularly cheesy centre, which can ooze apart as you break into them. They’re the perfect starter, or an indulgent on-the-go snack, whether cheese-, meat- or tomato-based.
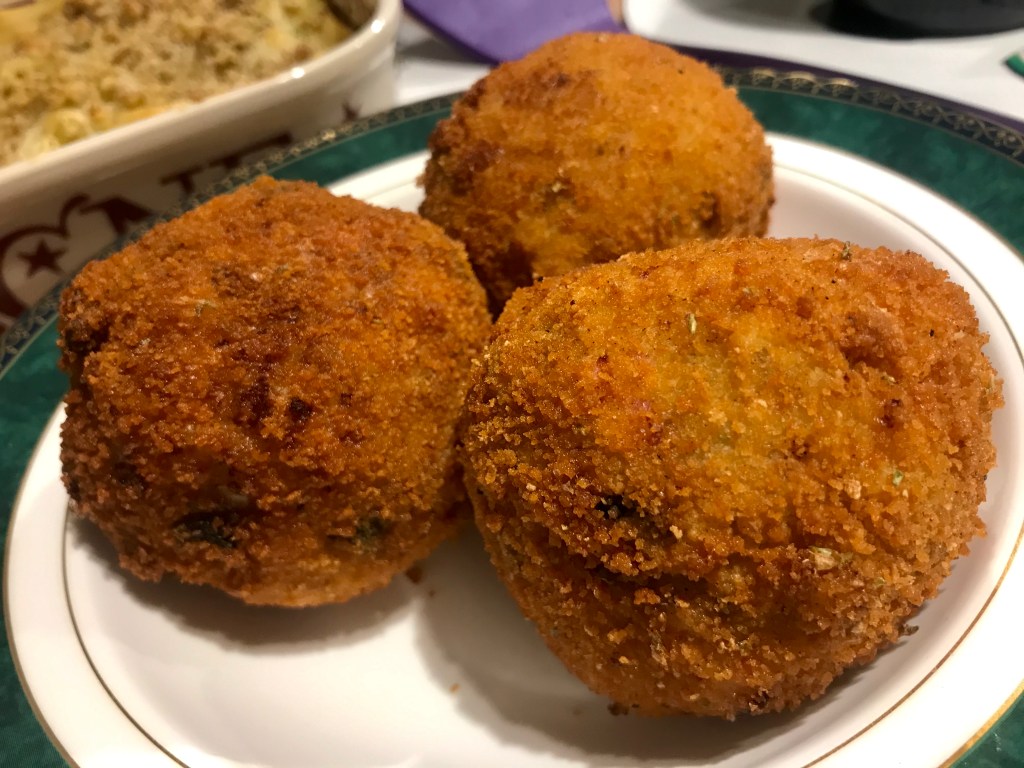
Having tried them both in the UK and Italy, I thought I’d attempt my own at home, bearing in mind I’d never made them before. A few months ago I made some prawn croquettes following a Rick Stein recipe, and this gave me a decent understanding of how a deep-fried treat with a creamy centre should be made.
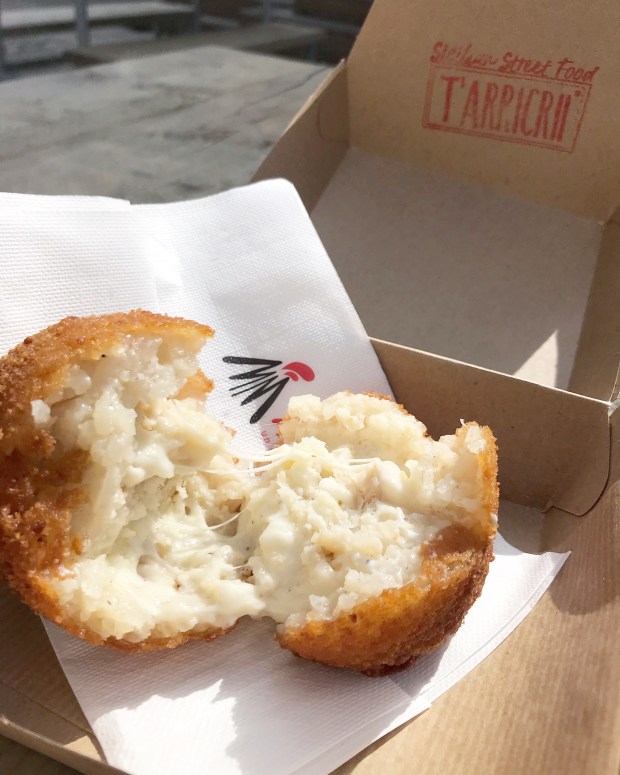
My favourite arancino (singular), I actually had in Manchester of all places, at a street food pop-up called Tarricrii. The arancini were huuuuge, and it was the melted cheesiness that had me sold.
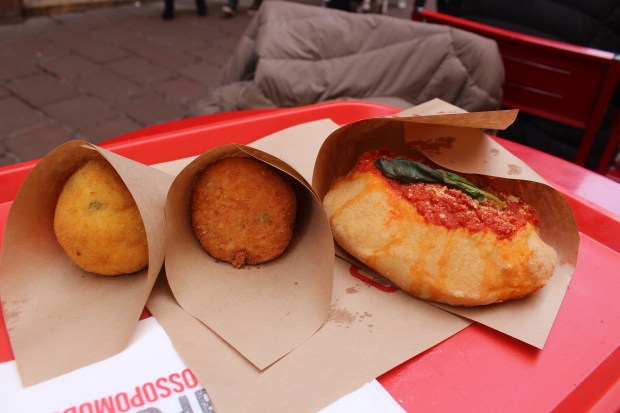
The two that I had in Bologna, Italy, were from an indoor market type place, and although I don’t remember the exact flavours, I know that at least one was tomato-based, there was beef mince involved, and peas featured somewhere. These ones highlight how arancini certainly don’t have to be cheese-filled, and this may be a bastardisation, but to be honest, given the choice, who wouldn’t want a sinking washing line of mozzarella to emerge as you break it apart?
The recipe below is for a ham and mushroom filling, however, it’s incredibly easy to customise the risotto filling, creating a vegetarian version for example, or even adding pesto, tomato sauce, or other meats.
Makes 9
For the Arancini
arborio rice (so sorry I can’t remember the quantity lol – enough risotto rice for 4 people would be a decent bet)
3 slices of thick ham (torn into small chunks)
8 chestnut mushrooms (sliced)
1 large onion
600ml chicken stock
Salt/pepper
Parmesan
1 ball of mozzarella
4tbsp cornflour
1 egg (beaten)
Fresh oregano (or dried if fresh not available)
1 cup breadcrumbs (sorry for the inconsistency of measurements!)
Splash of marsala
- Slice the onions and cook for at least 20 mins until caramelised.
- Add mushrooms and cook for a further 5 mins
- Add the arborio rice and coat with onion mix.
- Begin to add the stock and marsala little by little, gradually allowing it to reduce each time over a medium-high heat.
- Season, and add the ham, torn mozzarella, parmesan and oregano.
- When the risotto is complete, spread out flat on a tray with sides and chill in the fridge for at least 4 hours.
- When ready, remove from the fridge and form into large balls (or smaller depending on how you want to serve them).
- Roll the arancini first in a bowl of cornflour to coat, then the beaten egg mix, and then finally the breadcrumbs until fully coated.
- Heat your chosen oil in a saucepan and deep fry 2-3 at a time until they’re crisp and golden.
For the Roasted Red Pepper Sauce:
1 red pepper
½ onion
1 clove garlic
Salt/pepper
Cayenne pepper
Oregano
Tomato puree
Paprika
- Roast the pepper with a little bit of oil for 40 ish mins at 160 until it is bursting from its skin.
- Add to a food processor with the garlic and roughly chopped onion.
- Blend to a thick-ish paste/sauce and then stir through the remaining ingredients.
I was apprehensive about how these would turn out, but it’s ended up being one of my favourite recipes. They are best eaten fresh, and don’t freeze that well, so make only as many as you can eat!

They’re creamy, gooey, and dipping them into the red pepper sauce gives the perfect sharp kick to it. They are impossible not to like, and I think I’m going to have to try a gorgonzola version next…
I served these as a starter to my Chicken Pesto Lasagne which you can also find the recipe for here on my blog, so enjoy!
¡Comemos!
xo