Coconutty Fish Curry

This recipe wasn’t planned. It was a ‘what have I got in the fridge that needs using up?’ kind of meal, which then ended up being utterly delicious. It turned out that it was fresh fish stock and coconut cream that were in my fridge, crying out to be saved, avoiding getting lost behind mountains of double cream, yoghurt and pancetta, or indeed, just ending up in the bin.

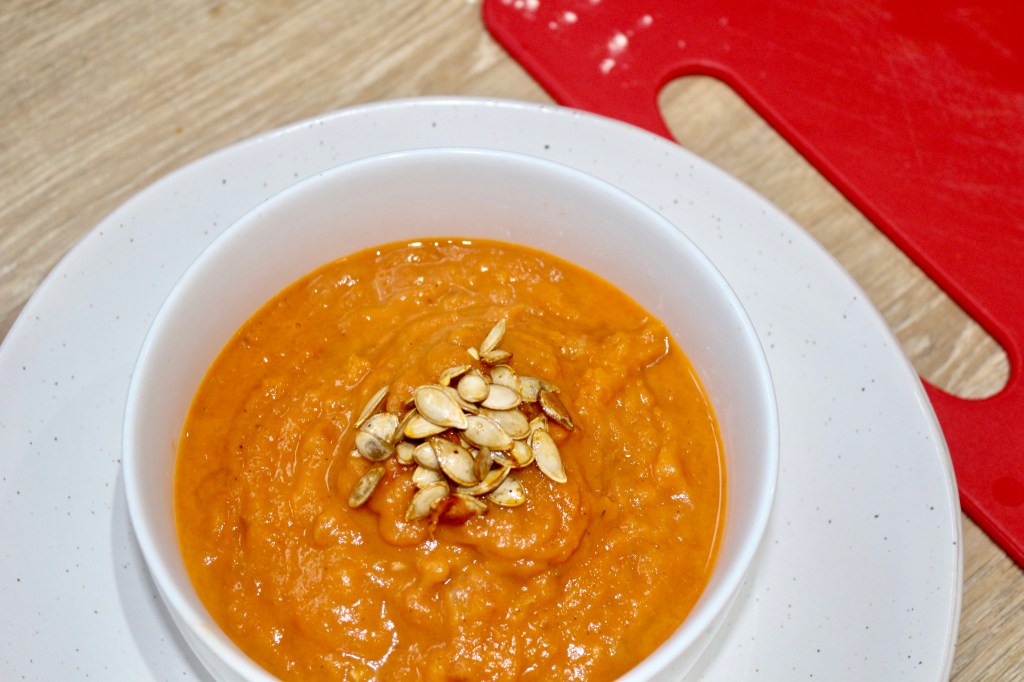
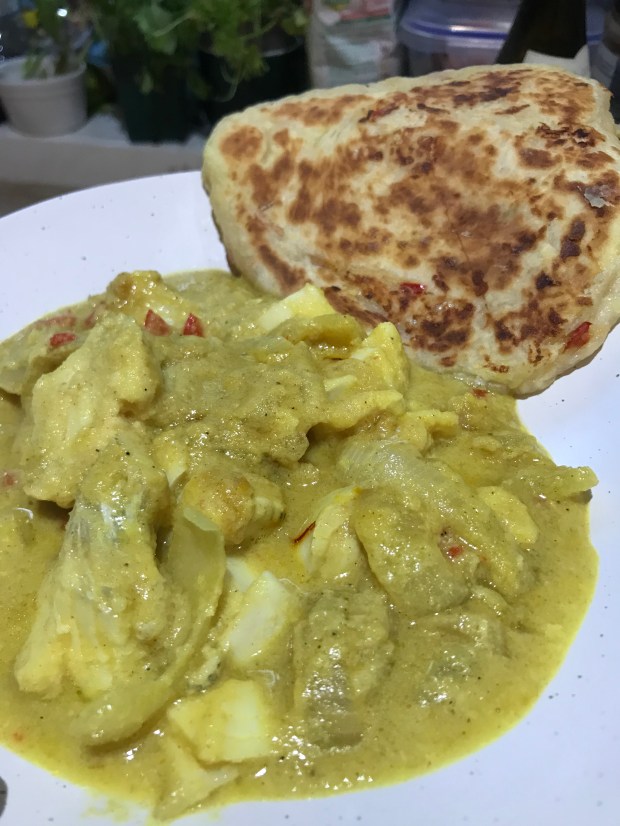
I can’t say it’s the most photogenic dish, but we’ve got way too caught up in a world where a dish’s appearance is more influential than its flavour, so excuse the imperfect imagery, and simply try it for yourself – this definitely bears more resemblance to curries in India than restaurant or takeaway curries!

The idea of making a curry without using a ready-made sauce or paste can often seem like a lot of effort, but experimenting with different spices and flavourings is what makes it exciting. I can assure you that this curry recipe is very straightforward and doesn’t require a food processor or hand blender for the base paste.

You can adjust the spice levels to your taste – this wasn’t fiery, but I do like a fair bit of chilli in mine.

Serves 2

1 large onion

Thumb of ginger

1 whole chilli

1 ½ tsp turmeric

1tsp chilli powder

40g coconut cream (I used the kind that comes in a solid block)

250ml fish stock (fresh if you can find or make it)

2 white fish fillets

A pinch of saffron

Sprinkling of desiccated coconut

Rice or flatbread to serve

  1. Slice the onions and cook for at least 20 mins in oil on a low heat until they are beginning to caramelise.
  2. Add the diced chilli and grated ginger along with all the spices except the saffron. Cook for a few more minutes until fragrant.
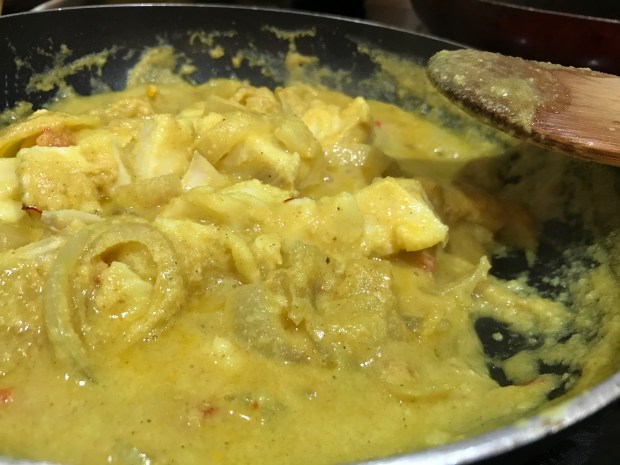
  3. Add the coconut cream and fish stock, turning up the heat slightly and cooking until reduced by1/3. 
  4. Add saffron and chunks of fish (or you can keep the fillets whole) and cook until fish is done.
  5. Serve with rice and a sprinkling of desiccated coconut. 

As you can see, there are so few steps to this recipe, and once the onions are done, it’s a pretty quick-to-cook meal. It’s sometimes difficult to leave the onions alone for so long, as the temptation is just to get on with things, but allowing them to properly caramelise really does add to the flavour so try to resist the urge to move on too early – I promise it’ll be worth it.

¡Comemos!

xo

Ham and Mushroom Arancini with a Roasted Red Pepper Dip

Arancini are one of Italy’s most delicious deep-fried snacks. Varying in size, they’re basically deep fried risotto, often with a particularly cheesy centre, which can ooze apart as you break into them. They’re the perfect starter, or an indulgent on-the-go snack, whether cheese-, meat- or tomato-based.

Having tried them both in the UK and Italy, I thought I’d attempt my own at home, bearing in mind I’d never made them before. A few months ago I made some prawn croquettes following a Rick Stein recipe, and this gave me a decent understanding of how a deep-fried treat with a creamy centre should be made.

My favourite arancino (singular), I actually had in Manchester of all places, at a street food pop-up called Tarricrii. The arancini were huuuuge, and it was the melted cheesiness that had me sold. 

The two that I had in Bologna, Italy, were from an indoor market type place, and although I don’t remember the exact flavours, I know that at least one was tomato-based, there was beef mince involved, and peas featured somewhere. These ones highlight how arancini certainly don’t have to be cheese-filled, and this may be a bastardisation, but to be honest, given the choice, who wouldn’t want a sinking washing line of mozzarella to emerge as you break it apart?

The recipe below is for a ham and mushroom filling, however, it’s incredibly easy to customise the risotto filling, creating a vegetarian version for example, or even adding pesto, tomato sauce, or other meats.

Makes 9

For the Arancini

arborio rice (so sorry I can’t remember the quantity lol – enough risotto rice for 4 people would be a decent bet)

3 slices of thick ham (torn into small chunks)

8 chestnut mushrooms (sliced)

1 large onion

600ml chicken stock

Salt/pepper

Parmesan

1 ball of mozzarella

4tbsp cornflour

1 egg (beaten)

Fresh oregano (or dried if fresh not available)

1 cup breadcrumbs (sorry for the inconsistency of measurements!)

Splash of marsala

  1. Slice the onions and cook for at least 20 mins until caramelised.
  2. Add mushrooms and cook for a further 5 mins
  3. Add the arborio rice and coat with onion mix.
  4. Begin to add the stock and marsala little by little, gradually allowing it to reduce each time over a medium-high heat.
  5. Season, and add the ham, torn mozzarella, parmesan and oregano.
  6. When the risotto is complete, spread out flat on a tray with sides and chill in the fridge for at least 4 hours.
  7. When ready, remove from the fridge and form into large balls (or smaller depending on how you want to serve them).
  8. Roll the arancini first in a bowl of cornflour to coat, then the beaten egg mix, and then finally the breadcrumbs until fully coated.
  9. Heat your chosen oil in a saucepan and deep fry 2-3 at a time until they’re crisp and golden.

For the Roasted Red Pepper Sauce:

1 red pepper

½ onion

1 clove garlic

Salt/pepper

Cayenne pepper

Oregano

Tomato puree

Paprika

  1. Roast the pepper with a little bit of oil for 40 ish mins at 160 until it is bursting from its skin.
  2. Add to a food processor with the garlic and roughly chopped onion.
  3. Blend to a thick-ish paste/sauce and then stir through the remaining ingredients.

I was apprehensive about how these would turn out, but it’s ended up being one of my favourite recipes. They are best eaten fresh, and don’t freeze that well, so make only as many as you can eat!

They’re creamy, gooey, and dipping them into the red pepper sauce gives the perfect sharp kick to it. They are impossible not to like, and I think I’m going to have to try a gorgonzola version next…

I served these as a starter to my Chicken Pesto Lasagne which you can also find the recipe for here on my blog, so enjoy!

¡Comemos!

xo

Pesto chicken lasagne

Who doesn’t love pesto? It’s basically a rite of passage to live off of a pre-made pesto pasta for at least half of your time at university nowadays, but it’s actually very simple to make yourself.

This recipe takes the greatest of the pasta sauces – both pesto and béchamel and combines them in a super creamy chicken lasagne dish, where you won’t need to spend ages simmering a ragù sauce and ensuring the meat is cooked adequately, as leftover chicken works a trick here.

With the crunch of almonds on top, combined with oozy melted cheddar, this is a super comforting dish that looks even more impressive than a standard lasagne.

Serves 2

Ingredients:

For the pesto

30g basil

30g pine nuts

2tbsp olive oil

1 clove garlic

1tbsp grated parmesan

For the lasagne

125g shredded cooked chicken

50g cheddar

4 lasagne sheets

2tbsp butter

1 clove garlic

3tbsp flour

milk

nutmeg

handful of almonds

  1. Preheat the oven to 180 degrees (depending on your oven – use your own judgement).
  2. Put all the pesto ingredients into a food processor and blend to a paste.
  3. Boil some salted water and part-cook the lasagne sheets until very al dente.
  4. To make the white sauce, melt the butter in a saucepan, add the diced garlic and flour and mix well.
  5. Add milk bit by bit, continuing to stir on a low-med heat until you have a thickened sauce.
  6. Grate in the nutmeg and remove from the heat.
  7. Mix the chicken and pesto in a bowl.
  8. In a food processor, blitz the almonds into coarse crumbs. For extra flavour, don’t wash out the processor after making the pesto, as then your almond crumbs will suck up all the excess pesto left in there.
  9. In a loaf tin, layer a lasagna sheet, then chicken and white sauce, then repeat twice more.
  10. Top with the final sheet and sprinkle with grated cheese and the almond crumb.
  11. Bake for 15 minutes until the cheese on top is golden.

¡Comemos!

xo

Octopus on a bed of chilli garlic greens

The amazing thing about cooking fish and seafood at home is, providing everything goes to plan, you end up with some serious restaurant-standard food. After a number of cheesy, creamy delights, I wanted to cook up something a bit lighter, knowing that what I was putting into my body was doing it some good, so that’s where this octopus recipe came into it.

There’s definitely a risk of over- or undercooking with octopus, both sins leaving you with a chunk of chewy, unpleasant meat, and so the key with a thick tentacle like the one I used is to cook it low and slow – a ‘bring to the boil then turn down to simmer for 45 minutes’ kind of cooking. This also allows you to get on with other things whilst cooking, and so your active time in the kitchen is minimal.

The nicest octopus I’ve ever had was at a restaurant in Lisbon. It was the first time I’d realised that octopus could be that tender, and cooked so simply. Served with some basic potatoes in a garlicky, buttery sauce (more like a light drizzle), it was pretty mind-blowing. Or at least I thought at that time that this was a revolutionary meal – changing the way I viewed octopus. Now, having cooked octopus myself that turned out equally as tender and delicious, I’m no longer under the same pretence that it’s incredibly difficult to achieve this beautiful tenderness. So simplicity here is everything. The kale with garlic and chilli will add all the flavour you need, whilst getting in some greens for a satisfying side dish.

Serves 2

Ingredients:

2 large tentacles

2 cloves garlic (crushed)

butter

splash of white wine

1 red chilli

salt/pepper

100g kale

100g spinach

  1. Put octopus in saucepan, cover with water, bring to the boil then reduce to simmer for 50 minutes until the meat is super tender.
  2. When done, heat butter in a frying pan and add 1 clove of crushed garlic.
  3. When fragrant, add the octopus, white wine and seasoning and cook on  medium heat until liquid has reduced and alcohol evaporated.
  4. Put the octopus to one side, keeping it warm all the while, and add more butter to the pan, adding the sliced chilli and other clove of crushed garlic when melted.
  5. After a few minutes, add the kale, cook for a further 3 minutes, then add the spinach and allow to wilt slightly.
  6. Serve the octopus on top of the bed of kale and spinach

The hardest part of this recipe to be honest is getting hold of the octopus tentacles. Once you’ve managed that, you’re pretty good to go. I got mine frozen from Bradley’s online, which I’ve mentioned before in various scallop and clam recipes. They have an amazing range of frozen fish, all of which has tasted delicious when I’ve cooked with it.

This dish looks beautiful and is super healthy, so don’t let your fear of cooking with seafood put you off trying it. You’ll be surprised by how little effort is involved!

¡Comemos!

xo

French Toast 2 Ways: Sweet and Savoury

Cooking for one can require a lot of planning sometimes, but luckily for me, I am the food planning queen. My intensive organisation essentially means I avoid wasting food, whilst also avoiding cooking the same boring meals over and over. If I plan, I can decide how to use the same ingredients to create different dishes, and that’s where my French Toast comes in.

One whole loaf of Brioche is quite a lot for one person to get through before it gets past its best, but I certainly managed it. Here are two ways to use that loaf in a short space of time in completely different meals. Both ideal for a delicious brunch, my sweet French toast stack, and savoury gooey eggy bread are indulgent, comforting and restaurant-brunch-worthy.

They’re incredibly easy to follow, so be sure to give them a go!

SWEET

Rocky Road Brioche French Toast Sandwich Stack

Serves 2

Ingredients:

6 slices of Brioche

Nutella

6 digestive biscuits

2 handfuls marshmallows (mini or larger ones torn into smaller pieces)

2 eggs, beaten

2 tbsp honey

2tsp vanilla essence

icing sugar

butter

  1. Whisk together 1 egg, 1 tbsp honey and 1tsp vanilla essence.Soak both sides of 2 Brioche slices – you don’t need to leave them for very long at all, as the egg mixture will very quickly saturate the Brioche and you don’t want it to end up falling apart!
  2. Heat the butter in a non-stick pan and fry the 2 soaked slices until golden on both sides. These will form the middle slices of each stack.
  3. Soak just one side of 4 more slices – 2 slices will form the tops of the sandwiches and 2 will form the bottom layers. At this point I needed to make a 2nd bowl of egg wash mix, hence the need for 2 eggs above so you may need to do the same.
  4. Now stack your sandwiches. The bottom slice should have egg wash only on the bottom side, and be dry on top. To this slice, add a layer of Nutella, a generous sprinkling of Marshmallows and crumble some chunky-ish pieces of biscuit over the top.
  5. Now add the middle slice of Brioche – remember, this is the one that we cooked at the beginning with both sides sealed in egg wash. Repeat the layering of Nutella, marshmallows and crumbled biscuit, and finish with the top slice (egg wash side facing upwards).
  6. Heat some more butter and add your 3 layer sandwich stack. Weigh it down by placing a small plate on top, followed by a heavy tin, as this will encourage everything in the sandwich to melt and bind it all together.
  7. After a couple of minutes on a low-medium heat, check that the bottom is golden brown, then turn over and do the same with the other side.
  8. Remove the sandwich to a plate (can cover with foil to keep warm), and repeat with your second sandwich.
  9. When both sandwich stacks are complete, sprinkle over the remaining marshmallows and biscuit crumb and drizzle over as much heated, loosened Nutella as you wish.
  10. Finish with a sieved sprinkling of icing sugar and dig in!

As always, I love a good plantification of dishes. For those unsure, that translates as a vegan alternative. As farfetched as it may seem, this is definitely not out of bounds for those following a plant-based diet. Nowadays you can buy vegan Brioche, get vegan Nutella equivalents, vegan butter-based biscuits and vegan marshmallows. The egg isn’t even an essential! For your wash, simply mix some plant-based milk with a little vanilla essence and maple syrup and it still work really well!

SAVOURY

Caprese Eggy Bread

Serves 2

Ingredients:

4 slices of Brioche

1 ball of mozzarella

handful of basil

6-8 cherry tomatoes (depending on how much you like them!)

salt/pepper

1-2 eggs, beaten

pesto – homemade or from a jar

butter

  1. Preheat the oven to 180C, and when ready, roast the tomatoes in a little oil, salt and pepper until they’re just bursting from their skins.
  2. Spread a layer of pesto on top of 2 of the Brioche slices.
  3. Tear the mozzarella and place that on top.
  4. Sprinkle over some pepper, followed by some basil leaves and the tomatoes. Add a little more salt and pepper and then top with the other slice.
  5. Soak the top and bottom sides of each sandwich in the beaten egg and then cook in melted butter in a non-stick pan on medium heat until golden brown. Like with the sweet version, place a small plate over the sandwich, topped with a heavy tin to weigh it down and encourage the mozzarella to melt and the sandwich to bind.
  6. Repeat on the other side and then slice into 2 large triangles to serve.

You may notice in the image above that I used larger salad tomatoes instead of roasted cherry tomatoes. Well, those tomatoes were rubbish and I don’t recommend trying that version – annoyingly, it’s the only photo I have!

Feel free to alter the proportions when it comes to the quantities of mozzarella, tomatoes, basil and basil you use. Make it your own, just how you like it. My original version of this recipe didn’t feature pesto, so you could try it without and the gooey mozzarella with sweet roasted tomatoes should do the trick equally as well – you could always add a drizzle of balsamic too, but I just adore pesto, and combined it creates a delicious pool of Italian flavours.

This has been one of my most exciting recipe posts to write, because having tasty, creative French toast dishes at home feels like such a luxury that’s normally reserved for quirky cafes and restaurants. But now it’s super simple for you to try yourself. Awful day at work? Why not go wild and even try it for dinner one day? When it comes to my meals, there are no rules.

¡Comemos!

xo

Creamy Scallop Pasta with Cheesy Chorizo Crumb

This pasta recipe combines the fanciness of scallops, with the flavour of chorizo and the comfort of gooey melted cheese. Basically, it’s the best of all worlds.

Recently I did a big order of frozen fish and seafood from Bradley’s, a family-run business based in West London. They only sell frozen fish, with the concept behind that being that often, lots of the ‘fresh’ fish we eat isn’t actually fresh at all, and has spent a fair while being transported around before it ends up on our plates. Their fish however, is frozen within 3 hours of being caught, therefore ensuring that both the flavour and the nutrients are bound within the products from the outset, so they taste just as good whenever you choose to eat them later down the line.

Part of my order included the queen scallops featured in this recipe. The kilo bag has provided me with many meals so far, with plenty more to come, and texturally and flavour-wise these small scallops are pretty good quality.

Serves 2

Ingredients:

200g penne pasta

30g chorizo

½ leek

1 red chilli

2 cloves of garlic

150ml double cream

150ml fish stock

2 tsp sun dried tomato paste

small pinch saffron

1tsp chilli flakes

salt/pepper

200g scallops

chives

parlsey

50g cheddar (grated)

  1. Chop the chorizo into tiny crumb/cube pieces then fry until beginning to crisp and set to one side.
  2. Fry the chopped leeks with the chilli and garlic on a low-medium heat until soft and fragrant.
  3. Cook the pasta according to packet instructions.
  4. Add the cream, fish, sun dried tomato paste, saffron, chilli flakes, salt and pepper to the leek mix and continue to cook on medium heat for 15 mins until reduced slightly.
  5. For a super smooth pasta sauce you can blend the creamy leek/stock mix at this point using a hand blender, although it isn’t essential.
  6. Add the scallops, chives and parsley to the pan with the sauce then mix in the pasta.
  7. Place in an ovenproof dish, and top with grated cheddar and the chorizo crumb. Put the dish under the grill until the cheese is golden and melted.
  8. Sprinkle with more chives to serve.

I always like to include alternative adaptations of my recipes, and this one is no different. If you can’t get hold of, or don’t want to use scallops, other seafood would also work. Admittedly, if you’re desperate to showcase amazing scallops, you probably won’t be serving them in a pasta dish, so for me, the scallops aren’t actually the most important part here. Pasta + salty chorizo + cream/cheese + seafood is always going to be a success, whatever ocean-dwelling treat you choose to include!

¡Comemos!

xo

Butternut Squash Soup

If you told me a couple of years ago that I’d regularly be eating soup for lunch and dinner I would’ve scoffed. Soup is a liquid meal – how can that possibly satisfy you and fill you up? Well, somehow it does, and I’ve now tried so many delicious soup recipes (Ainlsey Harriott’s in his Caribbean Kitchen cook book are fab), that I thought it was about time I came up with some of my own.

Butternut squash soups have always been some of my favourite, and a lot of that is down to the fact that they are never watery. I love a creamy soup, and with squash, you can get that lovely consistency without even having to add cream, and so it can still be a super healthy meal.

My soup recipe below is not only healthy, but also entirely plant-based (pretty easy to achieve with soups), and I’ve kept a pretty thick consistency. If you wanted a smoother, runnier soup, all you’d have to do is add a little more water, and blend more thoroughly.

And as anti-food waste as I am, there’s no need at all to throw away the seeds. They’re delicious roasted, and add a lovely crunchy to finish off the soup.

Serves 2

Ingredients:

½ squash (plus seeds)

1 carrot

2 ½ tbsp honey

1tsp paprika

salt/pepper

olive oil

1 onion

½ chilli

1 clove garlic

1 stick celery

50ml coconut cream

1 tin chopped tomatoes

100ml water

1tsp nutmeg

1tsp cayenne pepper

1tbsp nutritional yeast

  1. Roast the squash and carrot (both diced) with 1tbsp honey, paprika, olive oil and seasoning until soft and caramelised.
  2. Roast seeds in separate tray with the same honey coating (use ½ tbsp) until golden. These won’t take as long as the veg, so keep an eye on them.
  3. Sweat the onion in a saucepan or deep casserole dish (anything that the soup can happily sit in without overflowing!), then add the garlic and chilli.
  4. Add the chopped celery and seasoning.
  5. When the veg has finished roasting, add to the pot along with the coconut cream, tomatoes and water.
  6. Add the remaining spices, honey and nutritional yeast, and after stirring, bring to the boil then reduce to simmer for 20 mins.
  7. Remove from heat and blend with a stick blender and add a splash of water if the soup is too thick.
  8. Return to simmer for 5 mins then serve topped with the seeds.

This soup is full of flavour, with a little spicy kick to it, and there’s no way you won’t be satisfied after finishing a bowl. You could serve with crusty bread, but as this soup is on the thicker side, I find that I don’t necessarily want any heavy carbs to dip in (with a thinner soup it’s a different story…).

As is the case with most of my recipes, they’re really easy to adapt if you don’t have all the ingredients. Nutritional yeast isn’t essential, it just adds an extra, subtle umami flavour, and I prefer using a small amount of these flakes to a load of vegetable stock. Sweet potatoes would also work really well for the base of the soup, roasted cherry tomatoes instead of tinned tomatoes, and the coconut cream could be replaced by any other cream or coconut milk, or even just left out entirely for more of a light veggie, tomato flavour.

I really do love this recipe, more so than any of the other squash soup recipes I’ve tried elsewhere, so do give it a try.

¡Comemos!

xo

Spicy Seafood Noodle Broth

Many moons ago, after making my delicious paella, I used the mussel and prawn shells to make a shellfish stock which had been sitting in my freezer for a while waiting to be used. I didn’t want to use it for another rice dish, so came up with an alternative using noodles, which I very rarely cook with.

This broth is super light, but it certainly isn’t watery; I also refuse to call it a soup, as there’s so much more going on. It’s a bit of a spicy one, but of course you can play around with the ingredients to make it milder if you prefer; I however, love the kick.

I topped my noodle broth with some dumplings that I can’t claim as my own – I actually followed a recipe from Rick Stein’s Road to Mexico, but I definitely recommend seafoody-style dumplings as an ideal topping, as they add different textures to the dish, along with even more flavour. If you don’t want to go to the effort of making dumplings, other seafood such as prawns would also work really well, and as for the veg, you can mix and match as you like. I love steamed pak choi, but if I’d had some bean sprouts I definitely would’ve added those to.

This is a pretty straightforward recipe, but in order for it to really work, a stick blender is highly recommended, as otherwise you end up with little chunks of onion and chilli floating around, and although that doesn’t affect the flavour, you don’t get a lovely smooth texture. Stick blenders are so worth buying though, especially if you’re a fan of making soups and broths at home.

Serves 2

Ingredients:

1 onion

2 cloves of garlic

chunk of ginger

1 red chilli

small handful of cherry tomatoes

2tsp fish sauce

1tbsp rice wine vinegar

shellfish stock (or fish stock if you don’t have shellfish)

1 400ml tin coconut milk

2tsp sweet paprika

2tbsp sriracha

2tsp miso paste (dark)

bunch of coriander

2 nests of noodles (I used wholewheat)

1 spring onion

paprika flakes

chilli oil

optional toppings, i.e. dumplings, pak choi, bean sprouts, prawns, baby corn

  1. Heat the onion to sweat, and then add the garlic.
  2. Add the chopped or grated ginger, chilli and tomatoes and cook for 5 mins on a medium heat, stirring occasionally (turn down heat if they start to burn or catch on the bottom).
  3. Add the fish sauce and rice wine vinegar and cook for a further 5 mins.
  4. Pour in the shellfish stock, coconut milk, sriracha, miso paste and paprika, sprinkle in some chopped coriander and leave on a low-medium heat for 15-20 mins for all the flavours to soak each other up.
  5. Meanwhile cook your noodles and any toppings, i.e. steam the pak choi. NB. You could cook the noodles in the broth later on after it’s been blended if you prefer.
  6. Use a stick blender to blend the broth to a smooth, slightly creamy consistency.
  7. Add the noodles and top with whichever seafood or vegetables you’ve chosen
  8. Finish with a sprinkling of paprika flakes and spring onions, and a drizzle of chilli oil.

I love the colours in the finished dish – the bright, glossy orange, with the deep red paprika flakes and the contrasting fresh green from the veg. Although not based on any specific dish, this recipe is strongly Asian-influenced – I realise what a broad, sweeping statement that is – but I love how broth-style meals are such a staple in places like Vietnam (Pho), Malaysia (Laksa) and Japan (Ramen). They’re all so different both in terms of flavour and consistency, but what they have in common is the ability to demonstrate just how punchy, comforting and delicious, all at the same time, soup-like meals can be.

¡Comemos!

xo