Butternut Squash, Blue Cheese and Pear Puff Pastry Tart

I love puff pastry. The pre-prepared kind, that is. I’ve never attempted to make it myself, and maybe one day I’ll give it a go, but for now, ready-rolled is an absolute lifesaver.

I love the crunch as you bite into it, with little flakes floating down everywhere. It has a lightness that shortcrust lacks, and a delicious butteriness that you don’t get from filo.

Because you don’t need to make the pastry, this tart is so simple to make, and can be served as one large tart, or smaller, individual versions, using exactly the same measurements.

I used the amazing Beauvale blue cheese from Cropwell Bishop Creamery, which is local to me, as it’s incredibly creamy which is ideal for creating the dreamy melted blue cheese topping, rather than an equally as delicious, but not so practical crumbly Stilton.

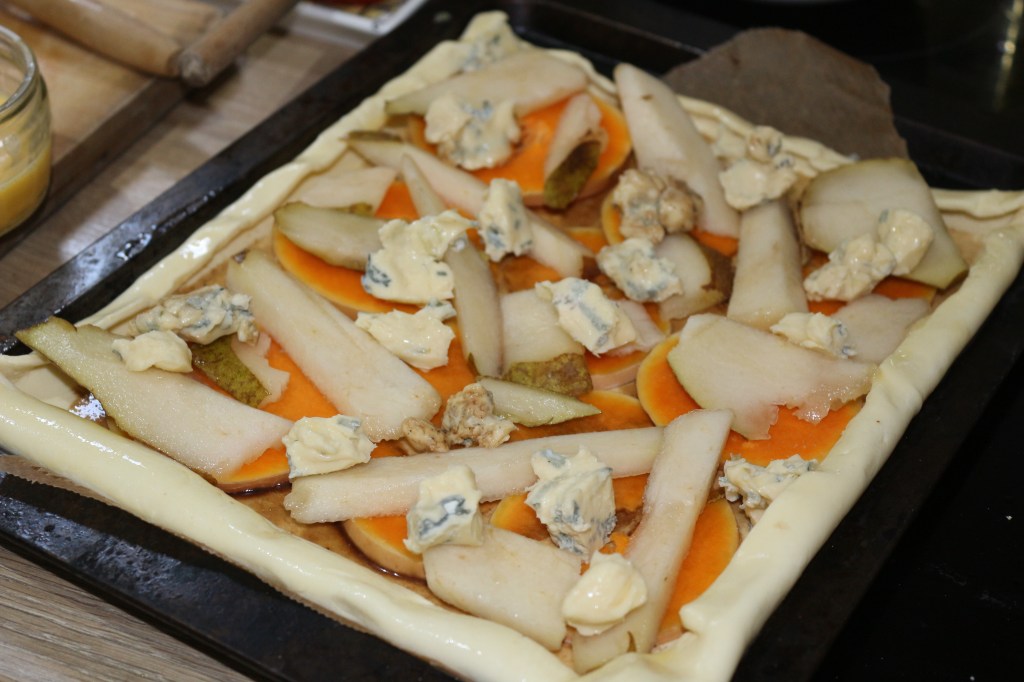
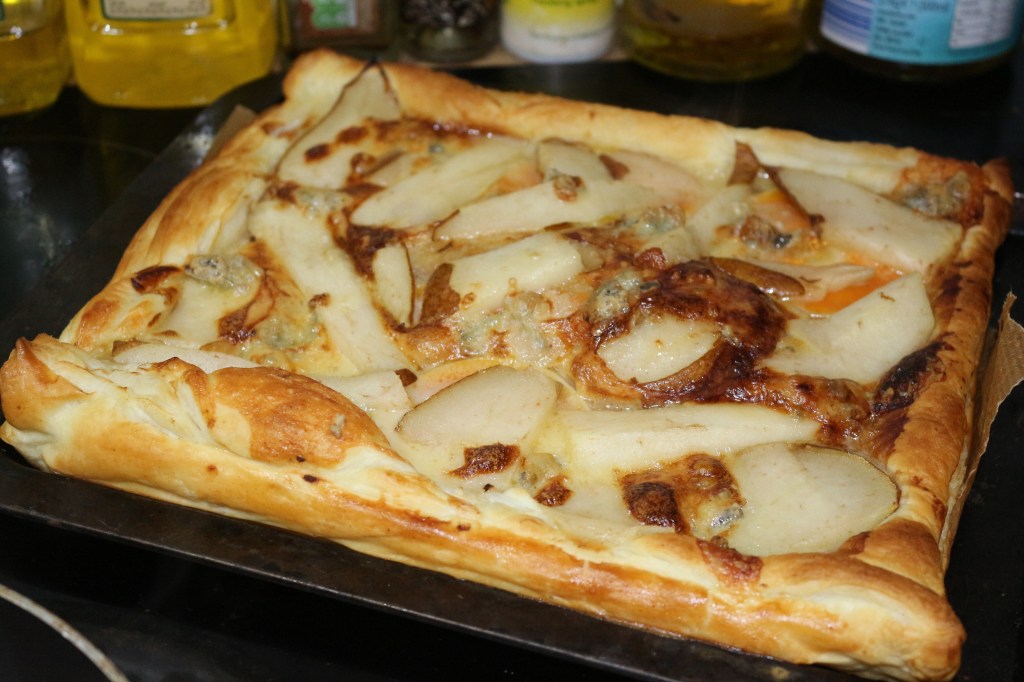
From the photos, you’ll notice that there are two versions of this tart that I made. The first used all the ingredients, but I wasn’t happy with the base, so decided to remake it, and the second version was spot on. Having said that, I didn’t have enough puff pastry or any pears the second time, hence the smaller tarts and fewer toppings.

You can absolutely get the tart to cook through completely without the bottom being soggy, but don’t be afraid to let the outside edges brown a little more to do so. Baking the pastry blind beforehand will also help to ensure it’s completely cooked through.

I won’t even lie, the first time I made this, I ate the entire tart in one go. I just kept going back for more it was so good, so now, over to you…

Makes 1 large rectangular tart and 4 individual tarts

Ingredients:

½ packet of ready rolled puff pastry

½ butternut squash

salt/pepper

rosemary

1tbsp cornflour

1btsp honey + 1btsp balsamic vinegar (combined)

1 pear

75-100g blue cheese (the creamier the better)

1 egg, beaten

chopped walnuts (optional)

  1. Preheat oven to 180.
  2. Cut squash into thin discs and add to a baking tray with olive oil, salt, pepper and rosemary, and roast until soft. This shouldn’t take long – around 10 mins, depending on your oven.
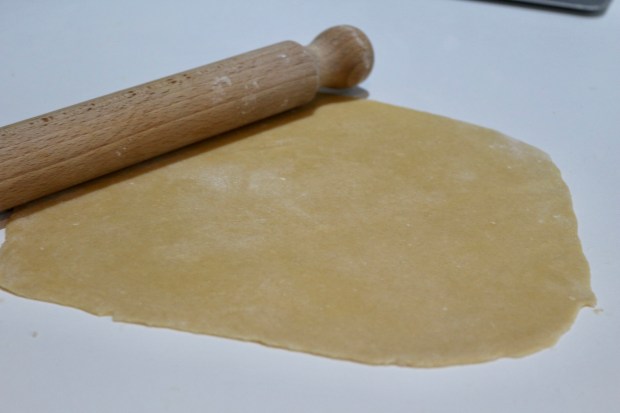
  3. Unroll the pastry and fold over the edges to create a crust. Bake the puff pastry until puffed up and starting to brown slightly (5-8 mins).
  4. Remove pastry from the oven and flatten out the puffed up centre.
  5. Sprinkle the cornflour over the pastry base so that any excess moisture from the filling will be soaked up.
  6. Layer over the squash, pear and chunks of blue cheese, then brush the edges with egg wash before placing back in the oven to bake until golden and cooked throughout. You will need to monitor the base as this will cook slower than the edges which will brown quickly, so turn the heat down if need be.
  7. After removing from the oven, ensure base is not soggy, top with the chopped walnuts and drizzle with the honey/balsamic vinegar dressing.

I topped the finished tart with my favourite spice mix, which is a Spanish brand, including garlic, onion, thyme, chilli flakes and some other spices in there, but you can top with whatever you enjoy – whether that’s a sprinkle of chilli flakes, a few sprigs of rosemary, a dusting of pepper, or just leave it as is!

Once you’ve baked your first tart, you’ll realise how easy it is to customise and make it your own. There are so many different toppings you could experiment with, from Italian caprese, to goat’s cheese and honey, or a classic cranberry and Brie. So get experimenting, and…

¡Comemos!

xo

Creamy Marsala, Mushroom, Chestnut and Pancetta Tagliatelle

A bit of a long-winded title but seriously, all the elements that go together in this dish deserve as much credit as each other.

My mum would always use Marsala in cooking, particularly in pasta and risotto dishes, and despite having no idea what it was, or that it even existed (nothing to do with Garam masala), I knew that every dish I tasted that had a splash of Marsala added was just that little bit tastier. This fortified Italian cooking wine, combined with salty pancetta and meaty mushrooms and chestnuts make the perfect combination. You can buy it from Italian delis or online. You should also try to use deli-style thick pancetta rather than the super finely cut supermarket slices, which just don’t have anyway near as much flavour.

This was also my third time making pasta. You absolutely don’t have to make the pasta yourself, and I’ll openly admit that I haven’t got it spot on yet. I absolutely loved the finished result, but I know this isn’t the classic light, silky fresh pasta you’d expect served to you in a restaurant, so feel free to either skip that step or use your own recipe or techniques. I actually ditched my pasta machine this time round because I found it way too fiddly to use, and a good old-fashioned rolling pin on the kitchen table did the trick, providing you persevere, getting the dough super thin.

I’d also like to highlight that the pasta dough recipe below is not my own, and is taken from Gino D’acampo’s Gino’s Pasta.

The pancetta does add a delicious crisp saltiness to the dish, but you could also use egg-free pasta and skip the pancetta for a plant-based meal. A small amount of miso paste could be a decent replacement just to hold on to some of those umami flavours.

Serves 2

For the pasta:

200g strong white flour

2 eggs

1tbsp olive oil

For the sauce:

150g mushrooms (button/chestnut)

50g cooked chestnuts

50g pancetta, diced

splash of marsala

100ml double cream (or plant-based alternative)

pinch of nutmeg

salt/pepper

a few sprigs of thyme

fresh parsley (optional)

  1. Sift the flour onto a work surface and make a well in the centre.
  2. Add the eggs, salt and olive oil.
  3. Mix the wet ingredients with the dry, slowly combining from the inside out (bring the flour on the inside of the well into the wet ingredients first and work your way outwards).
  4. Gather and knead to a soft dough (8 ish minutes).
  5. Roll into a ball and leave to chill for 20 minutes.
  6. Meanwhile start on the sauce. Brown the pancetta in olive oil then add the mushrooms and chestnuts.
  7. Pour in the Marsala, add the thyme and seasoning and cook on low-medium heat to reduce.
  8. Now back to the pasta. Remove the dough from the fridge, roll out very thinly so that you can see your hand through the dough either using a pasta machine or a rolling pin.
  9. Fold the rolled dough in half and slice into ribbons of equal width.
  10. Toss with a small amount of olive oil to stop the pasta from sticking together.
  11. Bring a pan of salted water to the boil and add the pasta. It will cook super quickly and generally is ready when it rises to the surface. Drain, reserving a tiny bit of the cooking water for the sauce.
  12. Finish off the sauce by adding a couple of tablespoons of pasta water, the double cream and nutmeg. Allow to cook for a couple of minutes before removing from the heat and tossing the pasta through the sauce.
  13. Serve immediately topped with a little extra thyme and/or fresh parsley.

Pasta-making aside, this recipe is super straightforward, and the sauce is easily customised. The creamy Marsala is beautiful on its own and so even if you didn’t want to add the mushrooms and chestnuts, it should still taste fab.

Enjoy, and…

¡Comemos!

xo

Spicy smoked cheese omelette

What is that?? I hear you ask. The deadest, most unphotogenic breakfast of all time?

Well, when it comes to unphotogenic, maybe, but I was so surprised how delicious this spicy cheesy omelette turned out that I just had to do this spontaneously basic post. I debated not including a photo because it looked so shit, but ultimately I felt like a recipe with no photo was a bit of a cop out, and I may as well open with something that looks a bit grim to grab your attention. Despite the world of instagrammable symmetrical plate aesthetics that we live in, let’s not forget that if you genuinely care about food, it’s all about the enjoyment of eating it rather than what it looks like, although a pretty plate is a pleasant bonus.

I used to find eggs so incredibly boring to eat and dull in flavour, which is a madness considering how versatile they actually are.

So now I’ve gone the other way; jumped on the ‘add a fried egg to everything’ bandwagon – burgers, toast, rice, you name it, there are very few dishes that can’t be enhanced by the addition of a fried egg.

But anyway, today isn’t about fried eggs, at least not in that sense. My breakfasts (when I actually have them) typically consist of something that I don’t deem to be time-consuming – granola, porridge or some kind of frozen leftover treat that I just need to reheat. This morning, however, I decided to push the boat out before work and cook an entire omelette!!

Obviously this whole notion of it being more effort is flawed anyway as stovetop cooked porridge probably takes longer and requires more patience and standing around, but still, I felt that this morning was going to be a major commitment.

Granted, only an idiot wouldn’t know how to whip up a standard omelette (if that’s you, yes, you are an idiot), but this one turned out to be so delicious that I had to share my satisfaction. With the kick of chilli and creaminess of the melting cheese, this breakfast was an absolute winner.

Makes 1 omelette

Ingredients:

2 eggs

Splash of milk

1/2 chilli (I used scotch bonnets but they don’t have to be this fiery)

Oregano

20g ish of smoked cheese

Mixed spices

Butter

1. Beat the eggs and add the milk, oregano, crumbled up cheese and chopped chilli then swirl to combine.

2. Heat a knob of butter in a non-stick pan over a medium heat.

3. Pour in the mixture and leave to cook and set.

4. When starting to set on top, use a spatula to examine the underneath to check when it’s golden with some darker brown patches. If you’re satisfied with the colour, instead of flipping the whole thing, just fold one half over the other.

5. Flip the folded omelette and leave for 30-60 seconds longer.

6. Serve up with your choice of seasoning. I used a mixed Spanish spice from the brand Toque which I think you can get online.

This is such a simple recipe but the flavour and the textures still wowed me. Feel free to alter the amount of chilli to your taste. You could also serve with a salad or even chips for a main meal. A drizzle of pesto would also be delicious on top.

This will make getting up for work in the morning so much easier, I promise.

¡Comemos!

xo

Paella de marisco

Paella is incredible. It’s one of the first foods from overseas that I remember loving. Holidaying in Spain fairly often when I was younger gave me loads of opportunity to get used to this beautiful seafood rice dish – surprising considering this was a time when I was incredibly fussy and actively disliked so many staple foods, even including plain white rice. I remember saying that I only liked ‘yellow rice’.

The highlight of my paella journey was probably having it for our Christmas dinner about ten years ago, and I can honestly say, with that incredible seafood, I didn’t miss the traditional roast at all.

There are many different varieties within Spain itself, paella valenciana being one of the most popular, and hailing from the city after which it’s named. You’ll find paella with a combination of seafood and chicken, some with either or, and sometimes vegetarian paellas are available.

Other variations that wouldn’t necessarily be classed as paella are arroz negro (black rice) which is made with squid ink, and fideua which uses short lengths of noodle-like pasta instead of rice. I’ve only ever had this once, but it was cooked by the abuela (Grandma) of the little boy I was looking after as an au pair in Barcelona. We went to stay in the grandparents house in Costa Brava for a weekend. She cooked this on the outdoor oven, and we sat in the sun by their pool (alright for some) enjoying this incredible meal. This was before I’d discovered my incredible appetite and I honestly struggled to deal with the amount of food they would try and pile into my plate, but they really did look after me.

I’m sure most Spaniards would be completely disapproving of any ‘paella’ recipe coming from elsewhere in the world, much as they were when Jamie Oliver added chorizo to his version, but you can guarantee that isn’t going to stop me from trying.

I browsed a selection of recipes online in the days before I was planning on attempting my own version, and so when it came down to it, I was able to wing this much-loved dish of mine.

When attempting dishes like this that are so adored in their country of origin, you kind of have to forget what people might think. Forget about how others might rip it apart, criticise every wrong turn. Just do it your way. Of course, if you are making any obvious major adjustments, it’s better to acknowledge this, and the fact that your version makes no attempt to follow the ‘traditional’ norms, but otherwise, you’re all good, and I don’t think I stray too far from tradition here.

Paella takes a bit of patience, but it’s actually very simple. My first attempt was certainly a raging success, even if I do say so myself.

Just promise me one thing – if you’ve bought one of those packets of frozen mixed seafood that no longer even bears any resemblance to seafood, not even an ounce of flavour, just don’t even bother with the paella. Not worth it hun x

Serves 2

1 red pepper

garlic

onion

Paella rice

Saffron

tinned tomatoes

pimentón

white wine

chicken or shellfish stock

peas

selection of seafood (mussels, squid, prawns etc.)

chicken thighs (optional)

lemon

  1. Preheat oven to 180C.
  2. Roast red pepper until it’s bursting from its skin.
  3. Heat oil in pan and fry garlic and onion until fragrant and softened.
  4. Add paella rice and coat with the oil already in the pan.
  5. Add a small amount of the tinned tomatoes or normal salad tomatoes.
  6. Add pimentón.
  7. Make up the stock and add the saffron then pour into rice bit by bit along with a splash of white wine.
  8. Add handful of peas and season.
  9. Whilst the paella is cooking, cook the seafood (and/or chicken) separately if necessary and then add to pan when done along with the cooking juices. Prawns can cook simply by sitting on top of the paella, same with squid. Mussels should be washed and cooked along with a splash of white wine, garlic and butter until open. Use your common sense with anything else.
  10. Keep adding stock until the rice is cooked through but still firm and there is no liquid left in the pan (if you overcook it the rice will go mushy so make sure you keep tasting as you go along).
  11. Stir through the roasted red pepper and top with the seafood, ensuring everything is warm and cooked through.
  12. Before serving squeeze lemon all over and serve with slices of lemon on top.

It may look like a lot of effort but actually the individual steps really aren’t. In terms of the ingredients, it can be as much or little effort as you like. Go for a simple chicken and/or prawn paella if that’s all you fancy. Or head down to your local fish counter to see what they’ve got in for a more ‘all-out’ dish like the one above, featuring mussels, monkfish, squid and langoustines.

Gonna end this one, bigging myself up a bit with something my friend said – apparently, after spending a year abroad in Barcelona, the flavour of the above paella that I cooked was better than any he’d had over there.

Need I say any more…

¡Comemos!

xo